
£150–£400 to move a radiator in London, DIY steps and when to hire
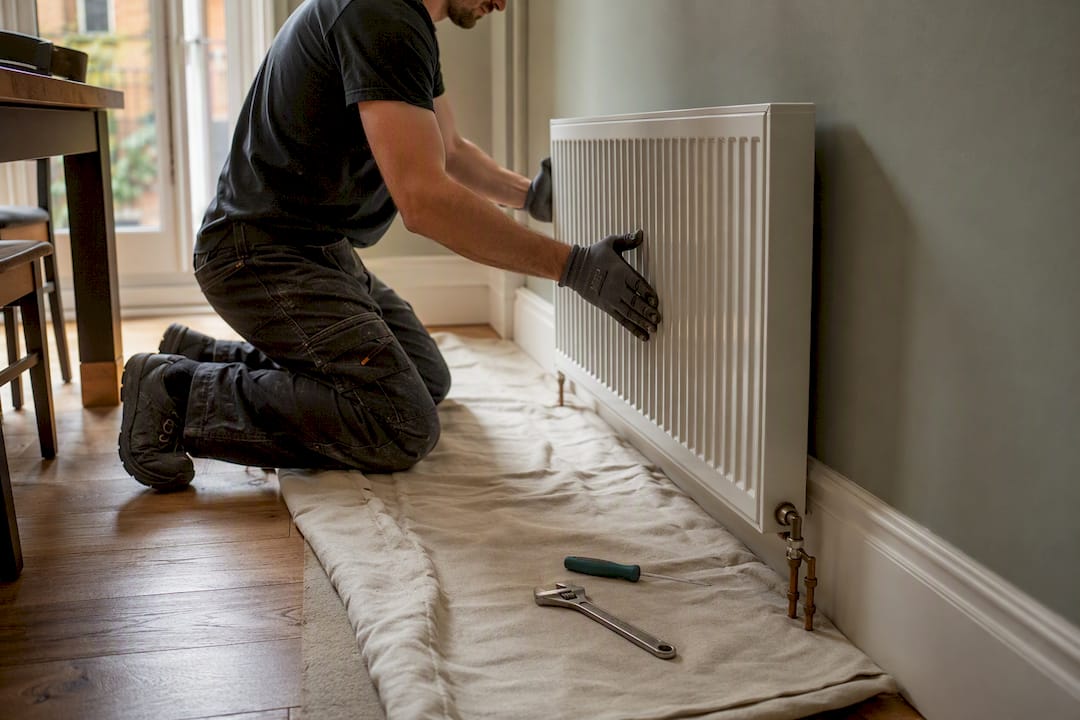
Most homeowners with basic DIY confidence can move a radiator over a short distance themselves, provided the isolation valves seal properly and no pipework needs rerouting. Budget roughly £150–£400 for a professional to handle a straightforward central heating radiator move, or less for a simple electric radiator swap. The one rule that matters most: never disturb a radiator until you’ve confirmed the system is fully isolated and cool, since incomplete draining is the leading cause of water damage on these jobs.
TL;DR:
Moving a radiator within the same pipe run typically costs between £150 and £400 and takes two to five hours for a short, like-for-like shift.
Re-routing or running new pipework significantly increases both cost, often over £400, and duration, sometimes exceeding a full day, requiring professional skills.
Homeowners should test and confirm that isolation valves fully seal before attempting a DIY move, especially on older or seized valves, to prevent leaks and water damage.
For radiators needing new pipe routes, lifting floors or chasing walls, professional installation is strongly recommended due to increased complexity and safety risks.
A confident DIYer can successfully move small, short-distance radiators if they can test valves, have basic plumbing tools, and lift heavy units with help, but complex jobs should always involve a professional.
Table of Contents
How much does moving a radiator cost, and how long does it take?
Cost depends almost entirely on whether pipework moves with the radiator. A like-for-like relocation, where the new position sits close enough for the existing pipes to stretch or extend, is a different job altogether from one that needs floorboards lifted or walls chased for new copper runs.
For a typical central heating radiator, UK trade guides put the average cost at around £275, with a realistic range of £150 to £400 depending on access and pipe distance. Electric radiators are usually cheaper to shift because there’s no wet system to drain. Simple electric radiator relocation is often charged at an hourly rate of around £40, since the job is largely a case of isolating the electrics, unmounting the unit and rehanging it.
Time on site varies more than the price does. Straightforward moves, where the radiator goes back up a short distance from its original position using the same pipe centres, typically take between two and five hours. Anything involving lifting floorboards, chasing a wall, or running new pipe under a screed floor can easily double or triple that.
Where you live changes the maths too. Trade day rates in London run well above the national average, and that premium hits hardest on jobs needing structural or floor work rather than a quick reconnect. London carpenter day rates sit noticeably higher than the UK average, which matters if your radiator move also needs joinery, such as lifting and refitting floorboards around a new pipe run.
Job type | Typical cost | Typical time |
Short move, existing pipe centres reused | £150–£400 | 2–3 hours |
Central heating radiator, moderate pipe extension | £150–£400 | 3–5 hours |
Electric radiator relocation | Around £40/hour | 1–2 hours |
Move requiring floorboard lifting or wall chasing | £400+ | Half a day or more |
Four things reliably push the price up: rerouting pipework rather than extending it, lifting floors to run new pipe underneath, handling a heavy cast iron radiator that needs two people to lift safely, and working upstairs where access and containment are harder to manage. If your move ticks more than one of these boxes, get a quote before assuming the DIY route will save you money once your time and any mistakes are factored in.
Can you move a radiator yourself, or should you call a plumber?
Ask yourself a short set of questions before picking up a spanner. Your answers will tell you fairly quickly which side of the DIY line you sit on.
Do both the thermostatic valve (TRV) and lockshield valve turn smoothly and seal fully when closed?
Is the move a short shift, with the new position close enough to reuse or gently extend the existing pipe run?
Can you get a second person to help lift the radiator, especially if it’s cast iron or a large panel type?
Do you have basic plumbing tools and comfortable, unhurried access to the work area?
Have you actually tested the isolation valves by closing them and checking the radiator cools without leaking?
If you answered yes to all five, a short, like-for-like radiator move is a realistic weekend DIY job. If any of the following apply, stop and call a plumber instead: the system uses old steam-style radiators, either valve is seized or won’t fully close, the property might contain asbestos or lead pipework (common in pre-1980s London terraces and flats), the move needs new pipe runs through walls or under floors, or the radiator sits upstairs where a leak could damage a ceiling below.
Pro Tip: Test your isolation valves a day before you plan to start work, not on the morning itself. Close both valves, wait an hour, and check the radiator has stopped heating. If it hasn’t, the valve isn’t sealing and you’ll need a plumber to replace it before any move can safely begin.
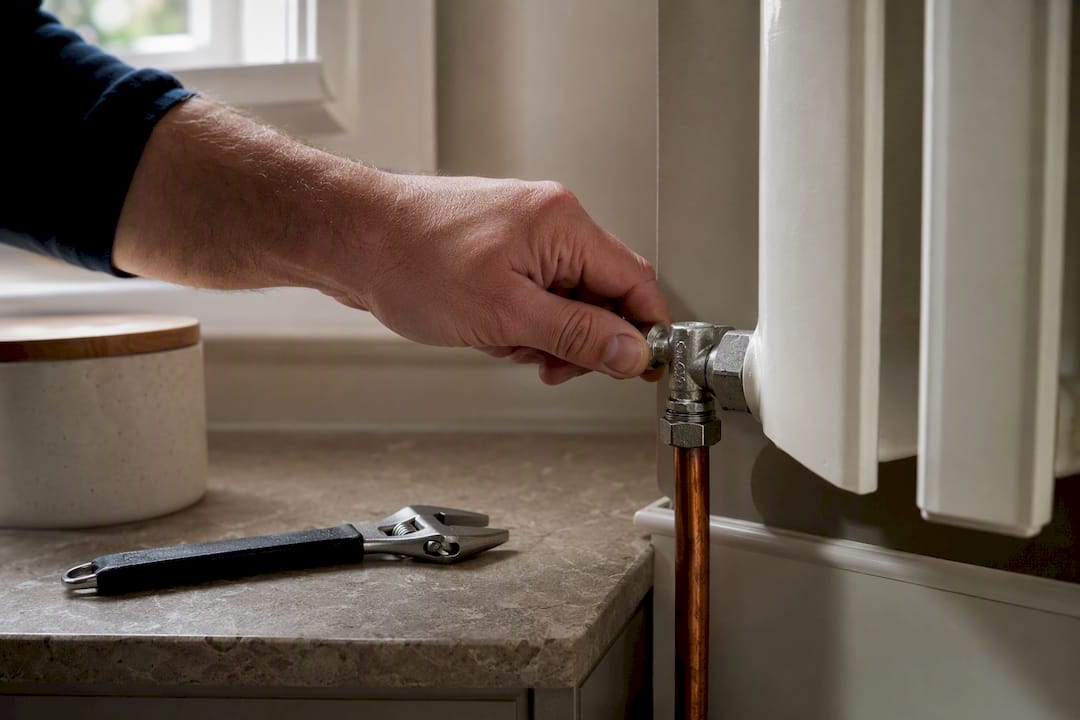
One red flag is enough to justify hiring a professional. Two or more, and DIY stops being a sensible way to save money. This lines up with wider experience on isolation valve reliability: when valves test correctly, a homeowner can often move the radiator without draining the whole system, but old or seized valves usually force a full drain and a plumber’s involvement anyway.
What tools and materials do you need to move a radiator?
A radiator move doesn’t demand a van full of kit, but turning up short of one item halfway through is how a two-hour job becomes an overnight mess.
Radiator key – opens the bleed valve to release trapped air and control drainage.
Two adjustable spanners – you’ll need to hold one union nut still while turning the other; a single spanner just spins the whole fitting.
PTFE tape – wraps threaded joints to guarantee a watertight seal on reconnection.
Bucket or drain tray, plus old towels – contains the water that comes out when you crack the unions open.
Dust sheets – protect flooring and skirting from drips and scuffs during the lift.
Spirit level and pencil – for marking accurate new bracket positions.
Drill and appropriate wall plugs – to fix new radiator brackets securely.
Keep spares on hand before you start, not halfway through: new fibre washers or O ring seals for the unions, a small tube of jointing compound as backup to the PTFE tape, and a replacement TRV or lockshield valve in case the existing one is seized or won’t reseal. It’s a cheap insurance policy against a second trip to the merchant with a radiator hanging half off the wall.
For the physical move itself, a sack truck or moving dolly makes life easier with anything heavier than a standard single-panel radiator, and a second pair of hands is non-negotiable for cast iron models. Clear the route between old and new positions before you start draining, so you’re not manoeuvring a dripping radiator around furniture.
How do you actually move a radiator, step by step?
This sequence covers a short, like-for-like relocation. Where the job needs new pipework, later steps flag exactly why that’s usually the point to bring in a plumber.
Turn off the heating and let it cool. Switch off the boiler and wait at least an hour, ideally longer, until the radiator and pipes are cool to the touch. Working on a hot system risks scalding and makes accurate valve control much harder.
Locate and test both valves. Find the TRV (thermostatic radiator valve) at one end and the lockshield valve at the other. Close both fully, then wait to confirm the radiator has stopped heating. This confirms isolation without draining the whole heating system.
Bleed the radiator. Use the radiator key on the bleed valve at the top to release pressure. This makes the drain-down controlled rather than a sudden rush of water.
Position your bucket and towels. Place a tray or bucket beneath the lower union, with towels around it, before you loosen anything.
Loosen the union nuts. Using one spanner to hold the valve body still and the other to turn the nut, loosen both unions connecting the radiator to the pipework. Go slowly. Water and trapped air will start to escape once the seal breaks.
Tilt and drain fully. Gently tilt the radiator to encourage remaining water out through the loosened union, catching it in your tray. This is the step where incomplete draining causes the most common water damage incidents on radiator jobs, so take the extra few minutes to get it properly empty.
Lift the radiator off its brackets with a helper. Once drained, lift evenly from both ends and set it down on old towels or a dust sheet. Cast iron and larger panel radiators can weigh between 50 and 100kg, which makes a two-person lift essential rather than optional.
For a short move with no new pipework needed:
Mark and fit new wall brackets, using a spirit level to keep the radiator straight, and matching the height and spacing of the original mounting where possible.
Reconnect the unions, wrapping fresh PTFE tape around each threaded joint before tightening. Reuse the original valves if they tested sound.
Hang the radiator on the new brackets, then open both valves fully and bleed again to clear any air pulled in during the move.
For a full relocation needing new pipework, the job changes shape considerably. You’ll need to plan the new pipe route first, working out whether pipes run under floorboards or need chasing into a wall. Lifting floorboards without damaging joists, or cutting a clean chase into masonry, both call for skills most DIYers don’t use often enough to do quickly or tidily; the guidance on safely cutting into masonry is worth reading even if you’re hiring the work out, so you know what to expect. Coupling new copper or plastic pipe into the existing circuit also needs correctly rated fittings and proper soldered or push-fit joints, since a poor connection here won’t show as a leak until the system’s back up to full pressure. This is the point at which most guides, and most plumbers, agree a professional should take over; rerouting pipework rather than extending it locally is consistently the single biggest driver of cost and risk on these jobs.
Repressurise the system, check the boiler pressure gauge sits in the normal range, then run the heating for fifteen to twenty minutes. Check every union and joint you touched for the faintest sign of a weep, and check again after the system has had a full heating cycle to warm and cool.
What are the most common mistakes when moving a radiator?
Nearly every radiator disaster you’ll read about online traces back to one of a handful of avoidable errors, and most of them happen because someone rushed the isolation step.
Assuming valves are closed without testing them. A valve that looks shut but hasn’t sealed properly will still weep, sometimes slowly enough that you don’t notice until the ceiling below shows a stain.
Working on a system that’s still warm. Beyond the scald risk, warm water expands and complicates drainage, making a controlled job messier than it needs to be.
Over-tightening or under-sealing unions. Cross-threaded nuts or missing PTFE tape are the classic cause of a slow drip that appears days later, not immediately.
Ignoring the pitch on older systems. Steam and some older gravity-fed systems rely on a specific fall along the pipe run; get the pitch wrong on refitting and you can end up with persistent airlocks or knocking pipes.
Not containing the drain-down. A bucket alone rarely catches everything; towels and a tray underneath give you a much wider margin for error.
If you find corrosion, sludge, or a valve that simply won’t budge, don’t force it. A seized valve often means internal corrosion that a hard twist can shear off completely, turning a controlled job into an emergency drain-down of the whole system. Community accounts from UK DIYers echo this pattern consistently: short moves generally go fine, but seized valves and sludge build-up are the recurring reasons a simple job turns into a call to a plumber halfway through.
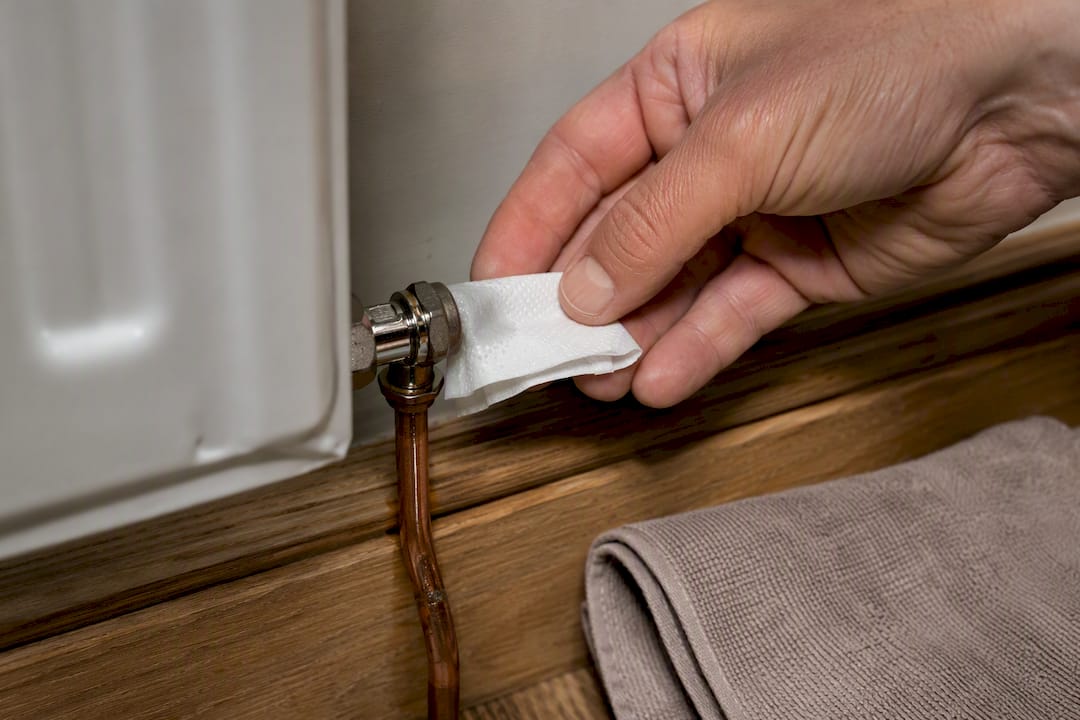
Run a proper leak check once everything’s reconnected: dry kitchen roll wiped along every joint will show the faintest damp trace that your eye might miss. If you spot any moisture at all after a full heating cycle, isolate the radiator again and recheck that joint before you consider the job finished. If you’re not confident diagnosing what you’re looking at, that’s the moment to stop and bring in a professional rather than run the system overnight and hope.
How do you test, bleed and balance the system afterwards?
Getting the radiator back on the wall is only half the job. The system needs to come back up to normal pressure and have any trapped air cleared before you can trust it’s working properly.
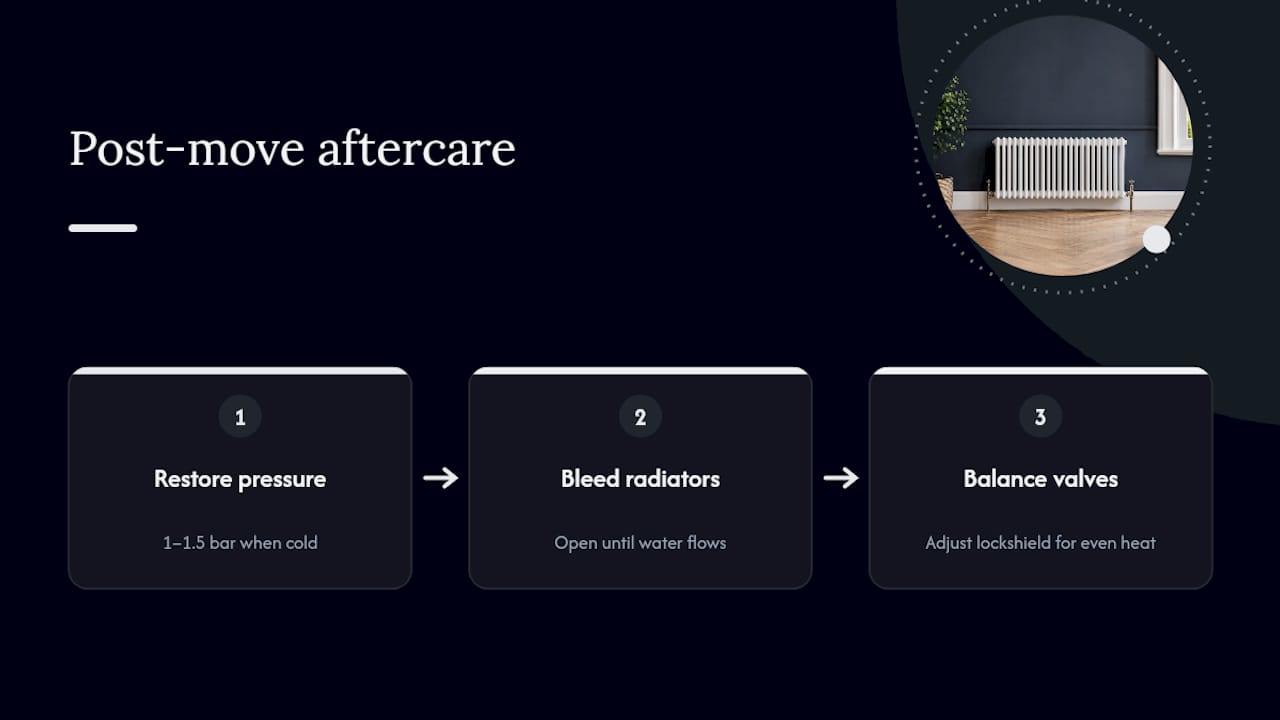
Check your boiler’s pressure gauge once everything is reconnected and valves reopened. Most domestic systems should sit between 1 and 1.5 bar when cold; if it’s reading low, top up using the filling loop according to your boiler’s instructions, adding water slowly and checking the gauge as you go.
Bleed every radiator in the property, not just the one you moved. Air can migrate through the system during a drain-down, so a radiator in a completely different room might develop a cold top corner or a gurgling sound over the next day or two. Use the radiator key, turn slowly until water rather than air comes out, then close it firmly.
Balancing is the step most DIYers skip, and it’s the reason a newly moved radiator sometimes heats unevenly compared with the rest of the house. Basic balancing means adjusting the lockshield valve on each radiator so that hot water circulates evenly across the whole system, rather than the nearest radiators to the boiler hogging all the flow. If you’ve only moved one radiator and the rest of the system was balanced before, a light adjustment on the lockshield of the radiator you moved is usually enough. If several radiators are running unevenly or the system feels sluggish generally, that’s a sign it’s worth booking a heating engineer for a full system service rather than guessing your way through valve adjustments.
When should you hire a plumber instead of doing it yourself?
Certain jobs are professional territory from the outset, no matter how confident you feel with a spanner. Any move requiring new pipe routes through walls or under solid floors sits in this category, as does anything involving a cast iron radiator heavy enough to need specialist lifting equipment rather than just an extra pair of hands.
Properties built before the 1980s carry a genuine possibility of asbestos in older pipe lagging or floor materials, and lead pipework still turns up in some older London housing stock. Neither should be disturbed without a proper assessment, so if your home falls into that bracket and the move involves lifting old flooring or disturbing wrapped pipework, get a professional in before you start rather than after you’ve found something concerning. Steam heating systems, rare now but still present in some period properties, also demand a specialist because the pressure and pitch requirements differ from a standard wet central heating system.
A proper quote from a plumber or a multi-trade team should cover more than just labour and materials. Expect a site survey that actually assesses your pipe routes and floor construction, a clear scope of what’s included, materials specified by type and quality, a realistic timescale, and confirmation of insurance and any workmanship warranty. If a quote skips any of these, ask before you sign anything.
At Tenen Ltd, radiator moves rarely happen in isolation. They tend to come up during a wider refurbishment, a bathroom renovation, or an extension where the heating layout needs rethinking alongside new walls or floor plans. That context matters: a radiator that needs moving because a kitchen layout is changing is a different job from one where the room’s staying the same and you just want the radiator somewhere more convenient. Approaching it as part of the bigger plumbing scope of a project, rather than a standalone task, tends to catch pipe routing issues before they become a second visit.
Is there a right and a wrong way to think about this job?
Homeowners tend to treat “moving a radiator” as one job, when it’s really two very different jobs wearing the same name. A short shift with sound valves and a pipe run that reaches is a genuinely reasonable weekend project for anyone comfortable with basic plumbing. A full relocation with new pipework is a different undertaking entirely, closer in complexity to a small bathroom refit than to hanging a shelf.
What surprises most people, having worked on refurbishments across London properties with a real mix of ages and pipe layouts, is how often the deciding factor isn’t skill at all. It’s the age and condition of the valves. A Victorian terrace in Fulham with original 1970s valves behaves nothing like a recently renovated flat in Chiswick with modern TRVs, even if the radiator itself looks identical. Test the valves properly before you commit to a DIY weekend, because that ten minute check tells you more about how the job will go than any tutorial will.
My rule of thumb: if you can answer every question on the DIY checklist with a confident yes, go ahead. If you’re hesitating on even one, that hesitation is information. Book a quote and let a professional confirm what you suspect, rather than finding out the hard way with the floorboards already up.
— Mateja
Want the job done properly the first time?
If reading through the isolation steps and pipe rerouting warnings has you leaning towards hiring a professional, that instinct is usually the right one for anything beyond a short, like-for-like move. Tenen Ltd handles radiator relocations as part of wider plumbing and heating work across full property refurbishments in Fulham, Chelsea, Kensington, Chiswick, Hammersmith and Notting Hill, with a director overseeing the project from the first site visit through to the final heat test.
A site visit will cover the practical questions that decide cost and timescale: where the new position sits relative to existing pipework, whether floors need lifting, and the condition of your current valves and radiators. Before requesting a quote, it helps to have a few photos of the existing radiator and pipework, the radiator type (panel, column or cast iron), and the flooring in the room, whether that’s floorboards, screed, or something else. Fixed, itemised quotes mean no surprises once work starts, and everything from the radiator move to any related plumbing runs through the same in-house team rather than a chain of subcontractors. If your radiator move is part of a larger renovation project, it is advisable to arrange a survey to properly assess and cost the full scope from the start.
Sources
The figures and steps in this guide draw on a handful of genuinely useful UK sources, worth bookmarking if you want to go deeper on any specific part of the job.
FAQ
How much does it cost to move a radiator in the UK?
A typical central heating radiator move costs between £150 and £400, averaging around £275, depending on pipe distance and access. Electric radiators are usually cheaper, often charged around £40 per hour since there’s no wet system to drain.
Can you move the position of a radiator?
Yes, radiators can be relocated within a room or to a different wall, either by extending the existing pipework or running an entirely new route. Short moves that reuse the existing pipe centres are far simpler and cheaper than relocations needing new pipe runs under floors or through walls.
Is moving a radiator a big job?
It depends entirely on the distance and whether new pipework is needed. A short move with sound isolation valves typically takes two to five hours, while a full relocation involving floorboards or wall chasing can take a full day or longer and usually needs a plumber.
Can I move the radiator without lifting the floor?
Yes, if the new position is close enough for the existing pipes to extend or stretch to reach it without a new route underneath. If the radiator needs to move to a different wall entirely, lifting floorboards or chasing a wall is usually unavoidable, and that’s the point at which most homeowners bring in a professional.
Do I need a plumber to move a radiator?
Not always. A straightforward move with working isolation valves and no new pipework is manageable for a confident DIYer, but seized valves, suspected asbestos or lead pipework, or any rerouting of pipes should go to a qualified plumber or a team like Tenen Ltd.
Recommended
Comments