
£70–£270 per m²: Underfloor Heating Costs for London Homeowners
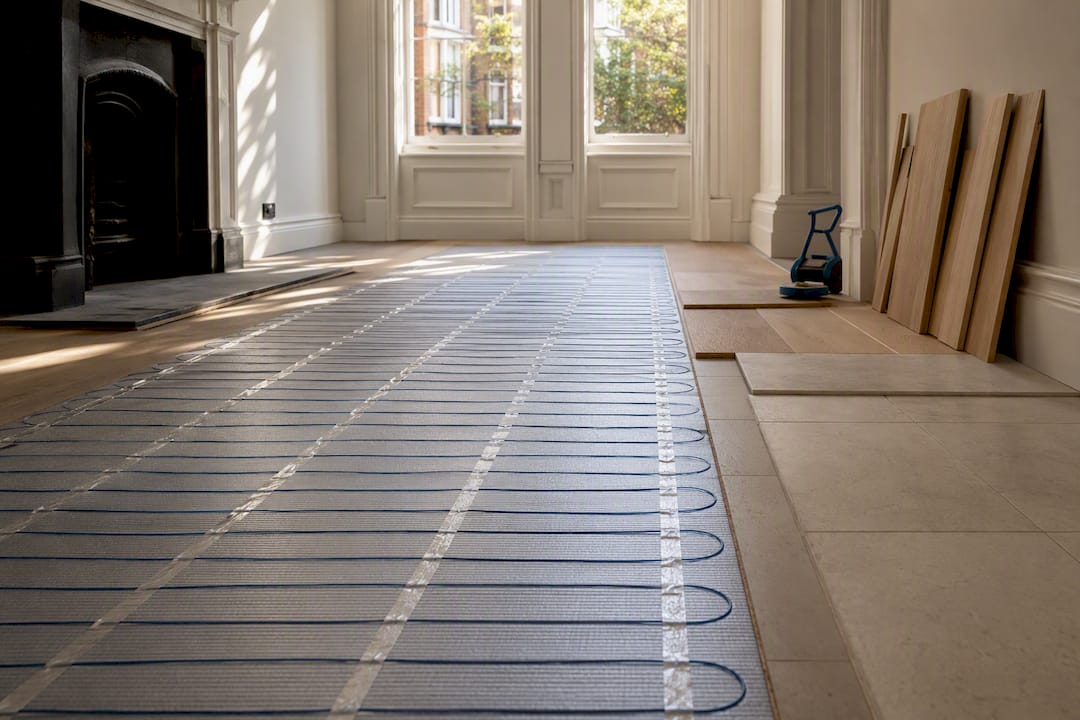
Budget for a typical London home varies widely, from under a thousand pounds for a small bathroom to more for whole-floor wet systems in period conversions. The single biggest driver is coverage: how many square metres you’re heating, and whether you choose an electric mat or a wet pipe system. Retrofits in older West and Central London properties cost more than new builds, largely because of floor build-up and access.
TL;DR:
London underfloor heating installation costs are typically between £70 and £150 per m² for electric systems and £110 to £120 per m² for wet systems, with higher rates for complex retrofits.
Costs increase significantly in heritage properties or retrofits due to floor removal, uneven joists, access issues, and additional site preparation.
Factors that raise quotes include floor build-up depth, zoning complexity, existing floor removal, and system controls, often adding hundreds to thousands of pounds.
Electric mats are generally cheaper to install but more expensive to operate than wet systems paired with a heat pump, which offer lower lifetime running costs.
Accurate quotes require specifying insulation types, floor finishes, zoning needs, and including a site survey to identify hidden costs and avoid discrepancies.
Table of Contents
Underfloor heating cost in London: per-m² bands and worked examples
London installers charge roughly 35% more than the UK average once you strip out materials and look purely at labour and site costs, according to TradeCost’s regional pricing analysis. That premium reflects congestion charges, parking restrictions, and a trade market where good fitters are booked months ahead.
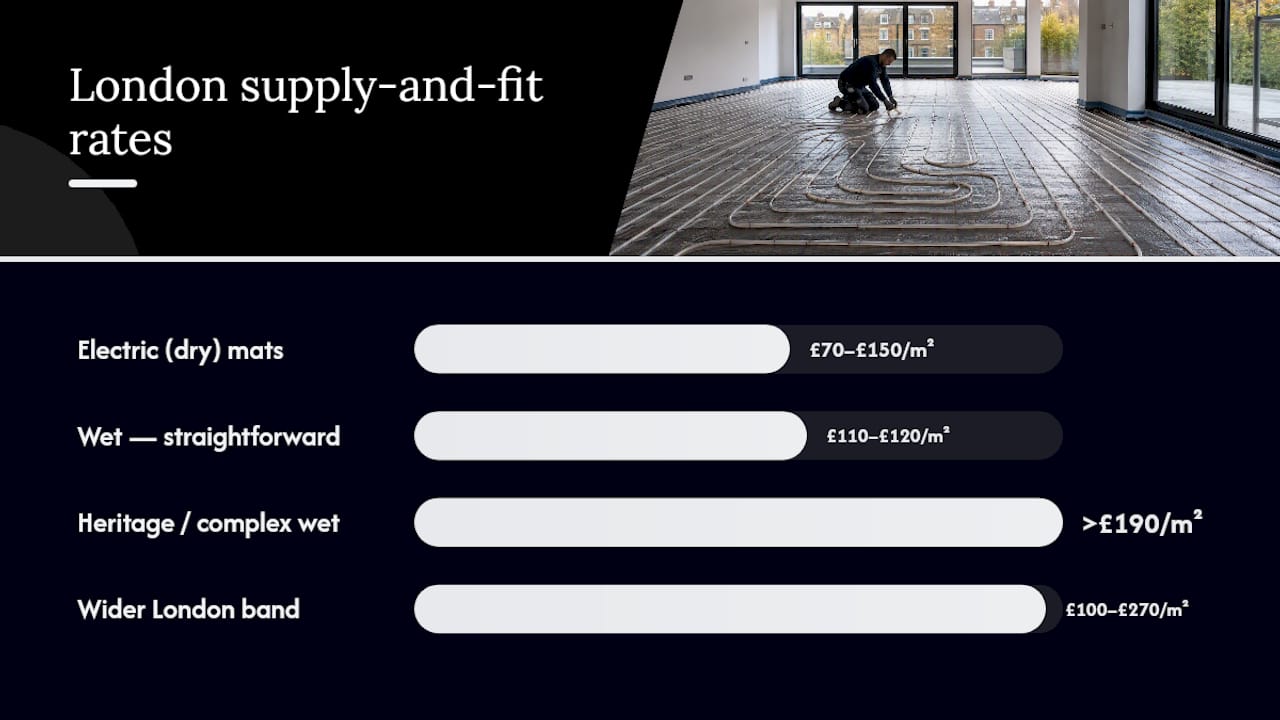
For electric (dry) systems, expect a supply-and-fit price of roughly £70 to £150 per m² in London, with the lower end covering simple mat installations under tiles and the upper end covering thicker insulation boards or awkward room shapes. Wet (water-based) systems typically run from £110 to £120 per m² for straightforward London installs, according to The Floor Heating Warehouse’s 2026 cost breakdown, rising well beyond £190 per m² for heritage properties or complex retrofits. TradeCost puts the wider London band at £100 to £270 per m² depending on complexity.
Here’s how those bands translate into real project costs, using typical room sizes found in British homes, including the kitchen dimensions tracked by Statista:
These figures are supply-and-fit estimates and exclude VAT, which is charged at the standard rate on most residential installation work. Always ask whether a figure is supply-only or supply-and-fit before you compare two quotes.
What pushes a London quote from low to high?
The number on a quote rarely comes down to the heating element itself. It’s everything underneath and around it that moves the price.
Floor build-up and insulation depth — thin insulation boards cost less but sacrifice efficiency; deeper, better-performing boards raise material cost but lower running bills.
Extent of coverage and zoning — heating one bathroom is simple; heating six rooms with independent thermostats needs a manifold, extra wiring, and more labour hours.
Removal of existing floor, levelling, and screed — stripping old tiles or timber, then laying a self-levelling compound or a full screed, often costs more than the heating system itself in older properties.
Controls and system integration — smart thermostats, zone valves, and boiler or heat pump compatibility all add to the bill.
Access, parking, and site extras — congestion charge zones, resident parking permits, and narrow terraced access in Chelsea or Notting Hill all add real cost that regional guides rarely mention.
Pro Tip: Ask installers to itemise the floor preparation separately from the heating system. It’s the easiest way to spot whether a “cheap” quote is hiding an expensive levelling job further down the page.
New build versus retrofit: which costs more and why?
Fitting underfloor heating while a floor is already open, during an extension or a full refurbishment, is consistently the cheaper route. There’s no old flooring to strip, no existing screed to work around, and no finished skirting to protect.
New build or extension — the heating goes in before the screed is poured, keeping labour costs lower and giving installers a clean run at insulation and pipe spacing.
Standard retrofit — existing floors need lifting, subfloors need checking for level, and low-profile electric mats or slim wet systems (as little as 15mm thick) often replace a full wet system to avoid raising floor heights against doors and skirting.
Heritage or complex retrofit — Victorian and Edwardian conversions common across West London often have uneven joists, limited depth, or protected features that rule out standard screed depths, pushing costs toward the top of the £190+ per m² band.
Electric mats tend to win out over wet pipework in single-room retrofits precisely because they add less height and disruption, even though they cost more to run day to day.
Running costs: electric versus wet, and how both compare to radiators
Electric UFH is nearly always the cheaper system to buy and install, but it’s the more expensive one to run, because electricity costs more per kWh than gas across most UK tariffs. Wet UFH paired with a heat pump tends to deliver the lowest running costs over the system’s lifetime, since it operates efficiently at lower water temperatures than a radiator system needs.
Electric systems suit occasional-use rooms like bathrooms, where running costs stay low simply because usage is short.
Wet systems suit whole-floor heating in well-insulated homes, where the lower flow temperature keeps a heat pump running efficiently.
Insulation quality, thermostat scheduling, and your energy tariff all matter more than the heating method itself once the system is installed.
Compared with radiators, underfloor heating spreads warmth evenly across a larger surface area, so it can run at a lower temperature for the same comfort level. The Floor Heating Warehouse notes that wet systems combined with heat pumps and good insulation typically produce the lowest lifetime running cost of any common heating setup, though the exact saving depends heavily on how well the rest of the house retains heat.
How long does installation take and how disruptive is it?
Installation time varies by project size, from a day or two for a single bathroom to potentially one or two weeks for a whole ground floor in a London terrace when including additional floor preparation work.
Liquid screed needs roughly seven days before foot traffic and up to 28 days before full curing, depending on thickness and product.
Self-levelling compound under electric mats cures much faster, often walkable within 24 to 48 hours.
Lead times for London installers can extend several weeks during peak demand seasons such as autumn and winter.
Dust sheets, floor protection boards, and phased room-by-room working all help protect existing finishes during the noisier stages.
How to choose an installer and what to ask before you sign
The written quote is where good and bad installers separate themselves. A proper quote itemises materials, labour, floor preparation, and controls separately, and states clearly what’s excluded, such as electrical certification or making good to skirting boards.
Trade credentials matter, but only the relevant ones. Gas Safe registration applies only if the job involves gas boiler work; it’s irrelevant to a purely electric UFH install. MCS certification matters specifically when a heat pump is part of the specification, since heat pump incentives like the Boiler Upgrade Scheme often require MCS-accredited installation. For general estimating and project management credibility, professional membership grades such as RICS or CIOB signal a level of formal training worth checking on larger jobs.
Ask what warranty covers the heating element versus the controls, and for how many years.
Ask who commissions and tests the system before handover, and whether that’s documented.
Ask for the exact screed or levelling compound specified, since screed choice must match the heating system at design stage to avoid expensive corrections later.
Treat vague scopes, no proof of insurance, or a fixed price well below every other quote as reasons to ask more questions, not reasons to book quickly.
Pro Tip: If you’re gathering multiple quotes, read our checklist for hiring contractors in London alongside this guide. Many of the same red flags apply whether you’re hiring for underfloor heating or a full refurbishment.
Building a like-for-like brief so quotes actually compare
Three quotes are only useful if they’re pricing the same job. Standardise your brief before you send it out.
Specify the same insulation type and depth for every quote request, since this alone can shift a price by hundreds of pounds.
Confirm the floor finish, tile, engineered wood, or carpet, as some finishes need thinner systems or different heat outputs. Our guide to flooring products for London homes is a useful reference here.
State the number of zones and thermostats you want, rather than leaving it to each installer’s assumption.
Add a contingency of 10% to 15% on top of any quote for a London retrofit, given how often hidden floor issues surface once boards come up.
Agree payment milestones tied to completed stages, never a large upfront payment before any work has started.
Book site surveys within the same week or two so conditions and installer availability don’t skew comparisons.
Tenen Ltd’s local experience and recommendations for London homeowners
Working across London for close to two decades has shown us the same pattern again and again: it’s rarely the heating system that blows a budget, it’s what the floor is hiding. Suspended timber floors in Victorian terraces, protected period features in conservation areas, and limited van access on narrow streets all add time and cost that a generic national guide won’t flag.
Before any site survey, take rough measurements of each room, decide on your preferred floor finish, and note anything unusual about access, such as no front parking or a narrow side passage. It saves a return visit and gets you a more accurate first quote.
— Mateja
Get a clear, itemised quote for your London project
A practical alternative to piecing together separate trades for a floor upgrade is having one team manage the flooring, screed, and heating together to avoid the coordination gaps that drive costs up when several contractors each price their own slice of the job.

A site survey can provide you with a written, itemised quote covering floor preparation, the heating system itself, controls, and any making good, so you can see exactly where your money goes before you commit. If you’re already planning a broader project, our home extension services in London show how underfloor heating fits naturally into a larger refurbishment. And if the floorworks involve ventilation or moisture considerations during curing, this ventilation cost guide is a useful companion read. Get in touch to arrange a survey and a detailed quotation for your property.
Sources
Recommended
Comments