
Keep Your Home Liveable: Four Phase Dust Control for UK Renovations
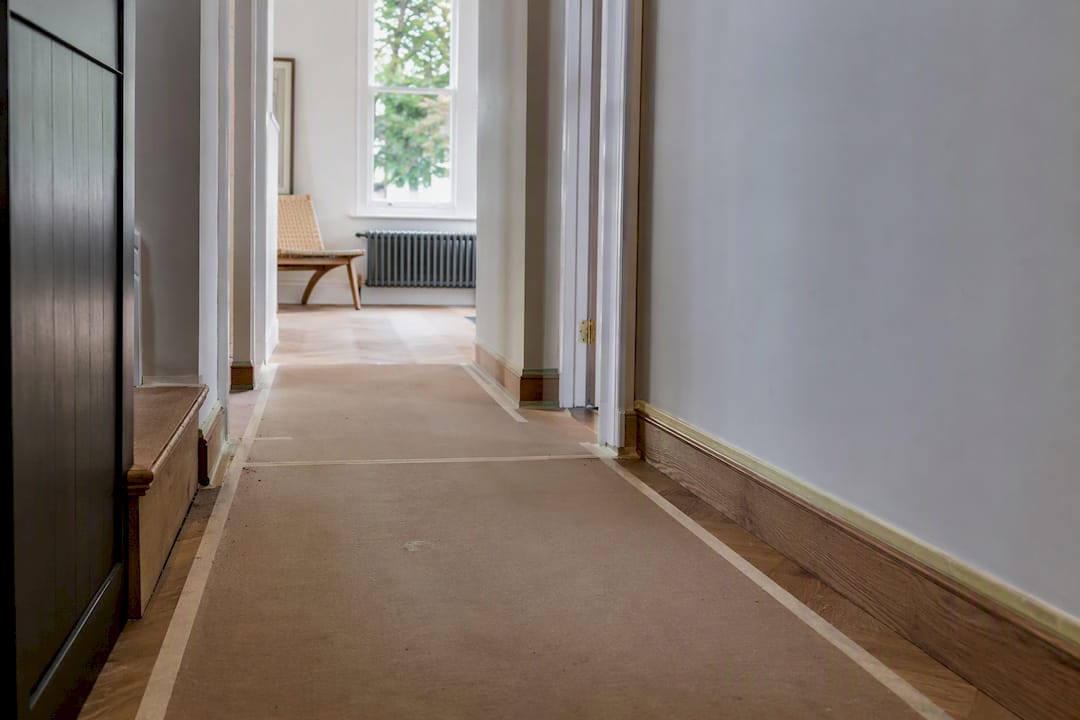
Contain the work area, run HEPA filtration to hold negative pressure during dusty tasks, and follow a daily cleaning rhythm. That’s the whole principle behind effective dust control during renovation. The HSE backs this with clear safety guidance, and it’s the same four-phase approach Tenen Ltd applies on every London project: protect your surfaces, isolate the work zone, control the air, then clean daily. Get these right and your home stays liveable from first fix to final handover.
TL;DR:
Proper surface protection before demolition can prevent hours of cleaning and damage, with flooring materials like Ram Board and Masonite being the best choices.
Isolation barriers, such as sealed sheeting and negative pressure systems, are critical to prevent dust from spreading through the entire house.
HEPA air scrubbers effectively remove construction dust if properly ducted outdoors, unlike consumer purifiers that cannot handle high dust loads.
A strict daily cleaning routine involving vacuuming, damp wiping, and sealing waste is essential to maintaining a livable home during renovation.
Major hazards like silica and asbestos require professional handling, and sequence planning—protection, isolation, filtering, cleaning—outperforms reliance solely on air filtration.
Table of Contents
How do you protect surfaces before renovation dust starts?
Protection has to happen before the first wall comes down, not after the first cloud of plaster dust settles on your oak flooring. Get the right materials down and taped properly, and you’ll save yourself hours of remedial cleaning and, occasionally, an awkward conversation about scratched floorboards.
For floors, Ram Board is the standard choice on hard surfaces like engineered timber or stone, since it’s breathable, resists tearing under foot traffic, and won’t trap moisture underneath. Masonite sheets work well over longer corridors or where heavier equipment will be wheeled through repeatedly. For softer surfaces, worktops, and anything you’re not walking on, 6-mil polythene sheeting taped down at the edges does the job at a fraction of the cost.
Stairs need particular attention because they’re the main dust highway between floors. Tape runners to each tread individually rather than laying one long sheet, which slips underfoot and becomes a trip hazard within days.
A few practical steps make the difference between a tidy job and a stressful one:
Remove artwork, mirrors, and soft furnishings from adjoining rooms rather than covering them in place.
Cover electronics, light fittings, and vent grilles with taped polythene, sealing every edge.
Use low-tack painter’s tape on painted trim and skirting to avoid pulling finish off when it’s removed weeks later.
Protect door thresholds with a strip of board to stop dust drifting under closed doors.
Pro Tip: Professional crews favour 3M No-Residue tape over standard masking tape on longer projects. It holds for weeks without leaving a sticky residue or lifting fresh paintwork, which cheaper tape almost always does after a fortnight.
If budget is tight, focus your spend on the floors and stairs first. Dust on a worktop wipes off in seconds; dust ground into an oak floor by work boots does not.
How do you isolate the work zone from the rest of the house?
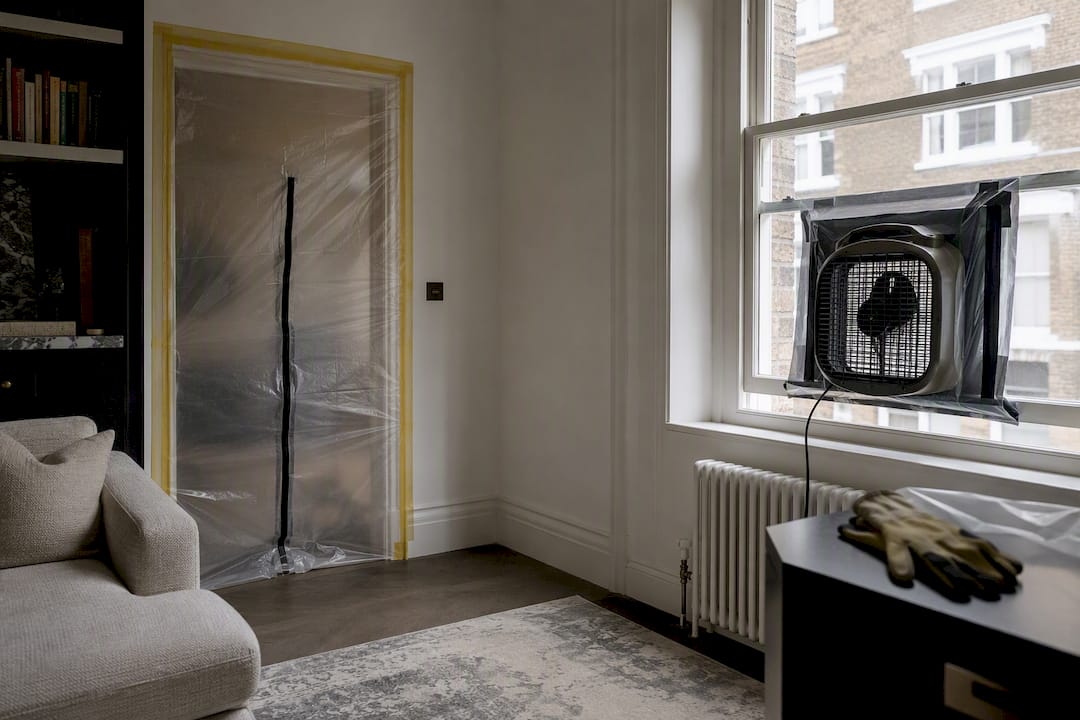
Isolation is what stops renovation dust becoming a whole-house problem instead of a single-room one. According to Fine Homebuilding’s job-site protection guidance, the crews that report the fewest cleaning callbacks are the ones who treat containment as seriously as the work itself.
A basic doorway seal takes under an hour to set up properly:
Fix spring-loaded poles floor to ceiling around the opening, using foam rails where poles touch plaster to avoid marking the ceiling.
Hang fire-retardant polythene sheeting across the frame, overlapping seams by at least 300mm.
Fit a zipper door into the sheeting for repeated access, rather than cutting a slit that tears wider with every use.
Tape the perimeter fully, including the floor edge, so there’s no gap dust can migrate through.
For bigger jobs, especially loft conversions or full refurbishments running several weeks, a framed temporary wall with rigid board is worth the extra setup time. It holds a tighter seal than poly sheeting alone and survives repeated foot traffic far better. Zipper doors suit shorter jobs where you need daily access without rebuilding the seal each time.
Negative pressure keeps dust flowing in one direction, out of your living space. A window fan pointed outward in the work room can manage a single space; a ducted air scrubber handles larger areas or long-running projects, and Dantherm’s guidance confirms these units can be vented outside to reinforce containment. Avoid venting into a shared stairwell or another occupied room, which just relocates the problem.
Pro Tip: Walk the entire barrier perimeter with a smoke pen once it’s up. Any smoke that drifts toward the clean side marks a leak, usually at a floor seam or a pole joint, and it’s far easier to fix before the sanding starts.
Which air control method actually removes construction dust?
Not all filtration is equal, and knowing which tool suits which task saves both money and frustration. Consumer HEPA purifiers are built for ambient household dust and pet dander. They’re not designed to keep pace with active demolition or sanding, where dust generation vastly outstrips their airflow capacity.
Professional HEPA air scrubbers are a different class of machine entirely. Rented by the day or week, they move far larger volumes of air, trap particles down to 0.3 microns, and, per Dantherm’s technical guidance, can be ducted outdoors to actively depressurise a work zone rather than just filtering the air that’s already there.
Source control matters just as much as air scrubbing. This Old House recommends capturing dust at the tool rather than chasing it around the room afterwards:
Fit sanders with dust shrouds connected to a HEPA-rated shop vacuum, which pulls the bulk of fine particulate before it becomes airborne.
Use track saws and circular saws with dust ports rather than open-blade cutting wherever the tool allows it.
Reserve tile saws and masonry cutting for outdoors or a garage with the door open, using a wet-cutting method to suppress silica dust at source.
Rental air scrubbers typically need filter checks periodically on heavy demolition jobs, more often if plaster or masonry dust is involved. If a task can be done outside, such as cutting skirting boards or tiles, do it outside. Indoor power cutting should be the exception, not the default.
What’s the best daily cleaning routine during renovation?
A dust-free home renovation doesn’t happen from one big clean at the end. It happens because dust gets managed every single evening before it has a chance to settle into fabric, grout lines, and air ducts.
Follow this end-of-day sequence and dust stops migrating overnight into rooms you’re still living in:
Vacuum the work zone floor with a HEPA-rated vacuum, working from the corners inward toward the exit.
Damp-wipe horizontal surfaces, tool handles, and window sills with a microfibre cloth rather than a dry duster, which just redistributes fine particles.
Empty and seal any containment bags or dust extraction canisters before you leave for the day.
Reset barrier zips and check tape hasn’t lifted at any seam.
Keep a tack mat or sticky shoe mat at the containment exit so boots don’t carry dust across clean flooring. Rohrer for Construction notes that this daily rhythm, vacuum, wipe, empty, is what actually keeps a renovation liveable rather than a once-a-week deep clean that lets dust embed in soft furnishings for days on end.
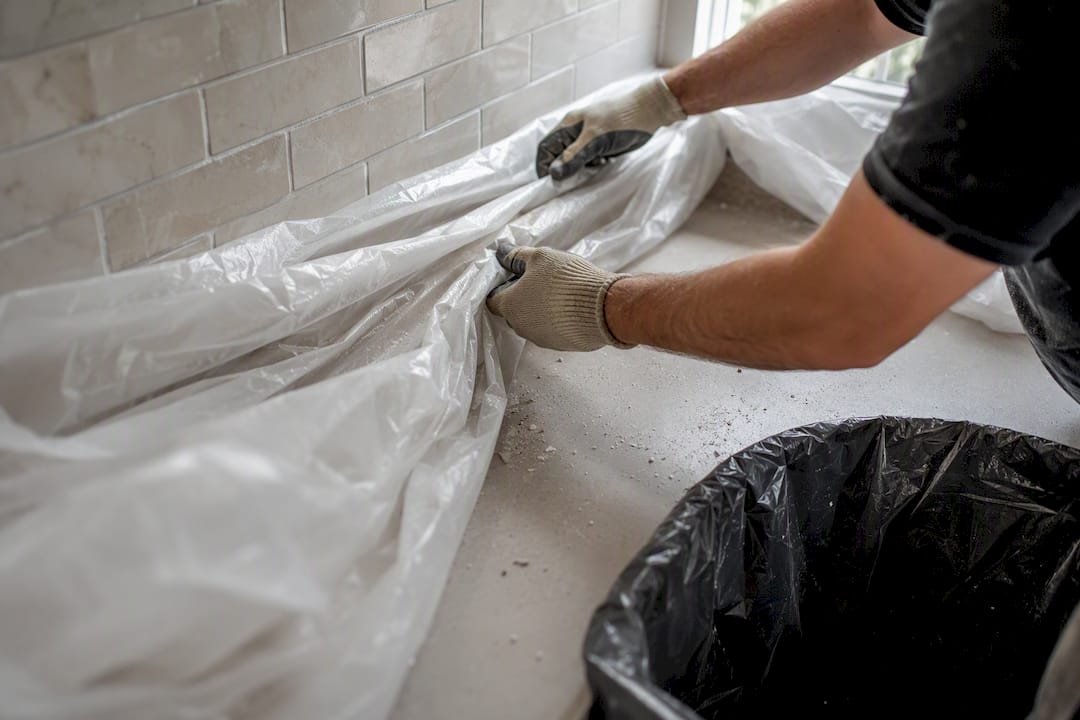
Store used protective sheeting rolled rather than folded, in a sealed bin bag, so trapped dust doesn’t shake loose the next time it’s unrolled.
How do you deep clean a house after renovation?
Once the work is finished, clean top to bottom in that exact order, because dust you dislodge from ceilings and light fittings will resettle on anything below it. Working bottom to top just means cleaning your floors twice.
The sequence that works: ceilings and light fittings first, then walls and window frames, then furniture and upholstery, and floors last of all.
Vacuum upholstery and curtains with a soft brush attachment rather than wiping, which can grind fine dust into the weave.
Clean electronics with a static-safe cloth and compressed air for vents and keyboards, never a damp cloth directly on screens.
Wipe extractor grilles and radiator vents by hand, since these trap fine dust that a standard vacuum attachment misses.
Change your central heating and ventilation filters immediately after a renovation, even if they’re not due for replacement, since months of fine dust will have passed through them. For larger projects involving significant demolition, a professional duct clean is worth the cost. A partner guide on post-construction dust removal covers this room-by-room sequencing in more detail if you want a fuller checklist.
Pro Tip: Remove barrier sheeting by folding the dusty face inward before you carry it through clean rooms. Carrying it flat, dust side out, is how most post-renovation recontamination actually happens.
What health risks does construction dust pose?
Respirable dust and crystalline silica are the two hazards that matter most, and they’re not equally visible. Fine dust from sanding plasterboard settles quickly and looks alarming but clears with basic ventilation. Silica dust from cutting brick, concrete, or tile is far smaller, stays airborne longer, and carries serious long-term lung health risks, as the HSE explains in its guidance on silica exposure.
Know when to stop and call in a specialist:
Suspected asbestos or lead paint in a pre-1980s property, which needs licensed testing and removal, not DIY containment.
Heavy, sustained silica-generating work such as large-scale concrete cutting, which needs proper respiratory protection under HSE dust guidance.
Vulnerable occupants at home, including children, pregnant women, or anyone with respiratory conditions, during any major dust-generating phase.
Workers cutting silica-heavy materials need a properly fitted respirator, not a disposable dust mask. Occupants in adjoining rooms during lighter work can usually manage with basic dust masks and good ventilation. If you’re venting dust outdoors, check the exhaust doesn’t blow directly toward a neighbour’s open windows or washing line.
How does Tenen Ltd manage dust on a renovation site?
Every Tenen Ltd project starts with a site survey that maps dust risk against the property’s actual layout, identifying which corridors, staircases, and rooms sit on the main dust path before a single tool comes out. That survey drives the same four-phase workflow covered above: protection goes down on day one, isolation barriers go up before demolition starts, air scrubbers run throughout dusty phases, and site teams follow the daily clean-down before leaving.
We favour Ram Board on hardwood and stone floors and 3M No-Residue tape on painted trim, specifically because both come off cleanly without damaging finishes our clients have often spent a fortune installing. When you’re briefing a contractor or reviewing a written contract, ask them to name their barrier materials, confirm who runs daily cleaning, and specify HVAC filter changes at handover. Our guide on hiring contractors in London covers the questions worth asking before you sign anything.
What actually matters most in dust control?
Most renovation advice treats dust as a nuisance to mop up rather than a workflow to manage, and that’s precisely where it goes wrong. Homeowners spend money on the wrong end of the problem, buying air purifiers before they’ve properly sealed a doorway, when a leaking barrier will out-produce any filtration unit you put behind it.
Sequencing beats spending. A £15 roll of polythene sheeting, taped correctly with no gaps, will do more to protect your home than a rented air scrubber running behind a barrier full of holes. Get isolation right first, then air control becomes the finishing touch rather than a rescue mission.
The other thing conventional advice underplays is HVAC. Blocking return vents feels intuitive but can strain the system, and it’s better to sequence register covers with portable filtration on the heaviest dust days and change central filters often rather than sealing vents shut for weeks. If you take one thing from this guide, make it sequencing: protect, then isolate, then filter, then clean. Skip a step and every step after it works harder than it should.
— Mateja
Want a professional to handle dust control for you?
If you’d rather not manage barrier installs, air scrubber rentals, and daily clean-downs yourself, Tenen Ltd builds all four phases into every managed project from the first site survey onward, so your home stays liveable while the work gets done properly.

Whether you’re planning a full refurbishment, a kitchen renovation, or a loft conversion, our in-house project management covers surface protection, containment, and site cleanliness as standard, not as an optional extra you have to negotiate. Every quote after a site survey sets out exactly who’s responsible for daily cleaning and HVAC filter changes at handover, so there’s nothing left ambiguous once work starts.
Request a site survey through our property refurbishment services page to see how we’d approach dust control on your specific project.
If your project involves a kitchen or bathroom, where sanding, tiling, and cutting generate particularly heavy dust loads, our bathroom and kitchen refurbishment team can talk you through the containment plan before you commit to a start date.
Sources
Recommended
Comments