
Loft staircase installation guide for UK homeowners
- luka bursac
- 11 minutes ago
- 9 min read
TL;DR:
A proper loft staircase must meet UK building regulations, including specific dimensions, fire safety, and headroom requirements. Accurate measurement, structural reinforcement, and compliance checks are essential to avoid costly mistakes and ensure approval. Using permanent stairs for habitable lofts is mandatory, and professional installation is advised for complex layouts.
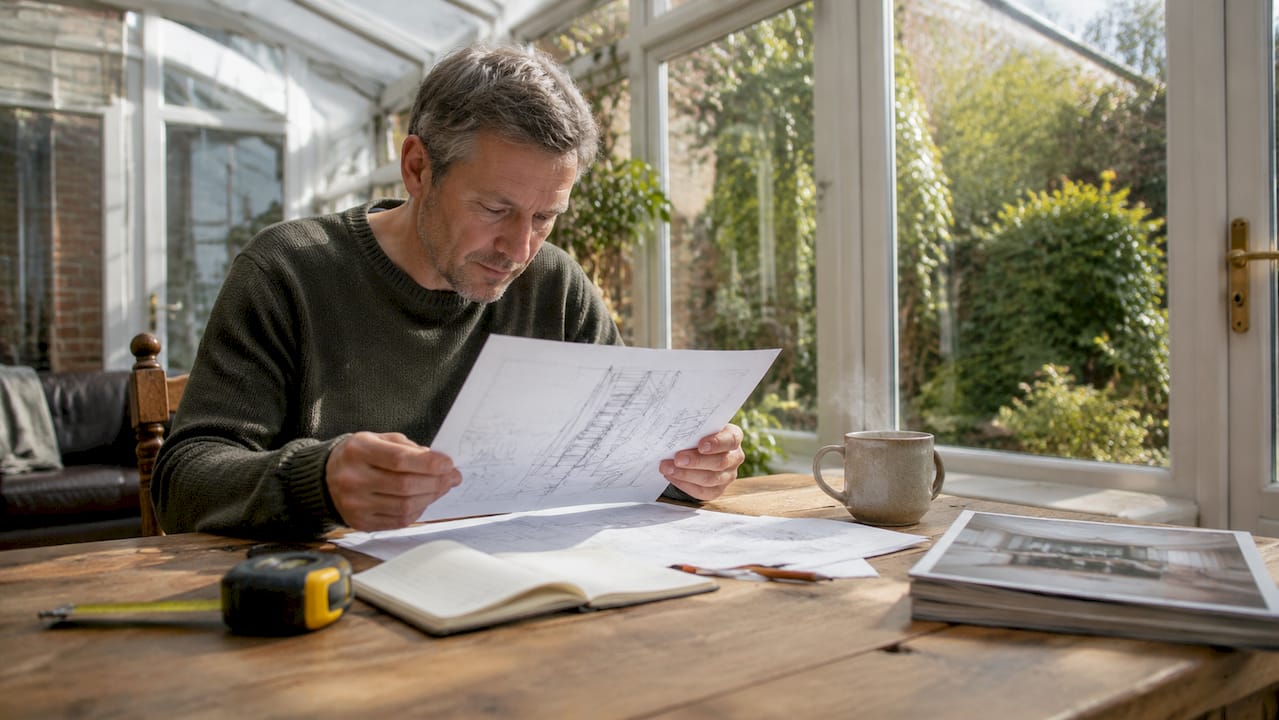
A loft staircase installation guide is the essential reference for any homeowner turning unused roof space into a liveable room. Done correctly, a permanent staircase satisfies UK Building Regulations, passes Building Control inspections, and adds genuine value to your property. Get it wrong and you face costly remediation, failed inspections, and potential problems at resale. This guide covers the regulations, preparation, stair types, and a step-by-step installation process so you can approach your loft conversion with confidence.
What UK building regulations must loft staircases meet?
UK Building Regulations set the legal baseline for every loft staircase. Approved Document K governs stair geometry, while Approved Document B covers fire safety. Both apply to any loft conversion intended as a habitable room.
The dimensional requirements are specific:
Maximum pitch: 42°
Riser height: 150–220mm per step
Going (tread depth): minimum 220mm
Handrail height: 900–1,000mm above the pitch line
Balustrade: must pass the 100mm sphere rule, meaning no gap wide enough for a 100mm ball to pass through
Headroom is where many projects run into trouble. The minimum headroom is 2,000mm, measured vertically from the stair nosing. Under sloping ceilings, permitted reductions allow 1,900mm at the centre line and 1,800mm on the lower side. Building Control inspectors flag headroom failures more than almost any other issue, so measure this before you design anything else.
Fire safety requirements are equally firm. The stair enclosure must achieve 30-minute fire resistance, and you need either FD20 or FD30 rated fire doors at the loft level. Mains-powered, interlinked smoke alarms are required on every floor of the home, including the new loft room. Building Control carries out inspections at the structural stage, mid-build, and at final completion. Missing any of these elements at inspection means delays and additional work.
Pro Tip: Register your project with Building Control before breaking ground. Inspections are staged, and starting without approval can invalidate the entire build.
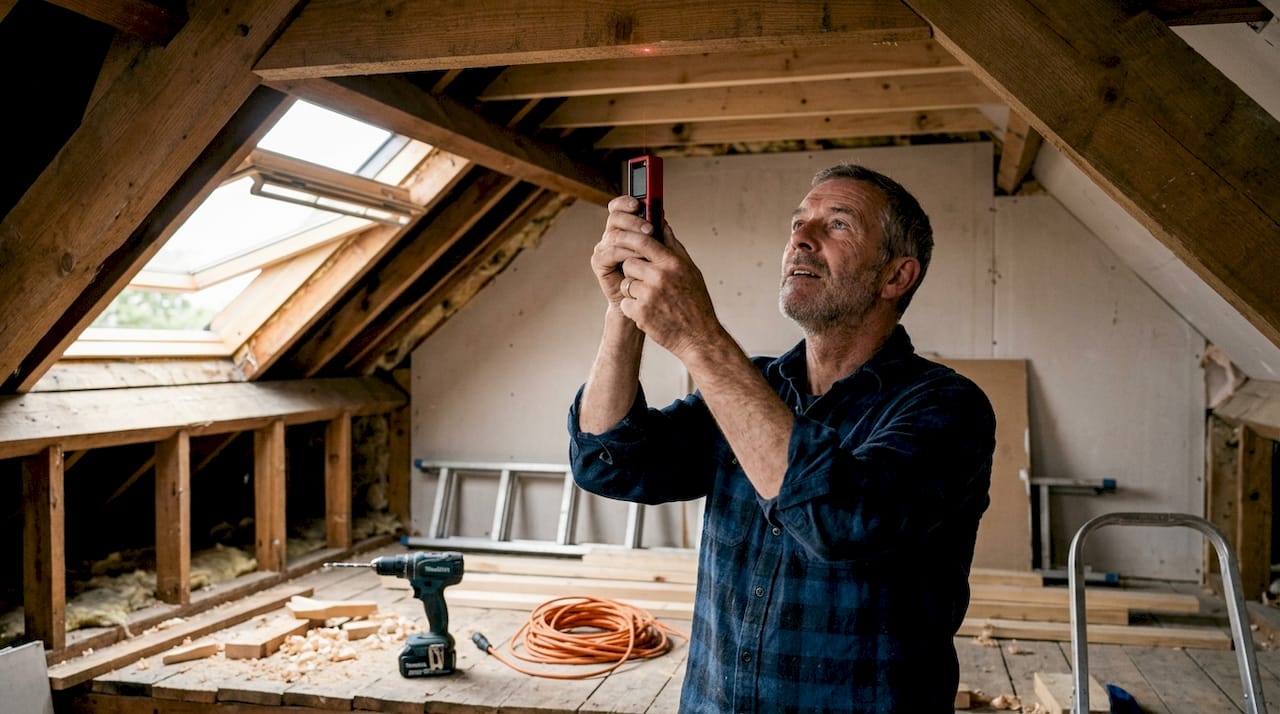
How to prepare your loft space for staircase installation
Good preparation prevents the majority of installation problems. Start by measuring your ceiling height accurately. A common and costly mistake is ignoring plasterboard and insulation thickness, which can reduce your vertical clearance by up to 200mm. Always measure to the finished ceiling level, not the raw rafters.
Next, locate the joists and plan your opening. The structural rules here are non-negotiable: joists must not be notched more than 1/6 of their depth. Exceeding that limit reduces structural capacity significantly. For wider openings, double trimmers are standard practice, and steel beams may be required depending on the span.
Before cutting anything, gather the right tools:
Reciprocating saw or jigsaw for cutting the ceiling opening
Drill and appropriate bits for fixing headers and trimmers
Spirit level (at least 1.2m long) for checking plumb and level
Tape measure and marking pencil
Safety goggles, dust mask, and knee pads
Structural adhesive and appropriate fixings
Check for hidden obstructions before you cut. Electrical cables, water pipes, and ventilation ducts often run through ceiling joists. Use a cable and pipe detector before marking your opening. Repositioning services after cutting is expensive and disruptive.
Preparation task | Key requirement |
Headroom measurement | Measure to finished ceiling level, not raw structure |
Joist assessment | Notch no more than 1/6 of joist depth |
Opening framing | Double trimmers; steel beam for wide spans |
Obstruction check | Use a detector before cutting |
Building Control | Register and obtain approval before starting |
Pro Tip: Sketch your staircase opening on paper with all dimensions before touching a saw. A five-minute drawing saves hours of remediation.
What types of loft staircase suit different homes?
The right staircase type depends on your available floor space, ceiling height, and how the loft will be used. Choosing the wrong type is one of the most expensive mistakes a homeowner can make.
Habitable loft conversions require permanent stairs. Pull-down attic ladders are only appropriate for storage access. Installing a non-compliant ladder in a habitable loft causes inspection failures and creates difficulties when you sell the property. This distinction matters enormously for planning.
Stair type | Best use case | Space needed | Compliance for habitable use |
Straight flight | Generous floor plans | High | Yes |
Winder staircase | Compact homes, corner positions | Medium | Yes |
Space-saver (alternating tread) | Very tight spaces | Low | Limited, check with Building Control |
Pull-down ladder | Storage lofts only | Minimal | No |
Winder stairs are particularly popular in Victorian and Edwardian terraces across West London, where floor plans are narrow. They turn through 90° or 180° using wedge-shaped treads, fitting into corners that a straight flight cannot reach. The trade-off is that winder treads must still meet the minimum going of 220mm at the walking line, so the geometry requires careful calculation.
Material choice affects both durability and installation complexity. Softwood such as pine is the most affordable and easiest to work with. Hardwoods like oak offer better wear resistance and a premium finish, though they are heavier and harder to cut on site. Steel and glass combinations suit contemporary interiors and can be fabricated to bespoke dimensions. For material inspiration across staircase finishes, marble and stone options are worth considering for high-specification projects, though they require specialist installation.
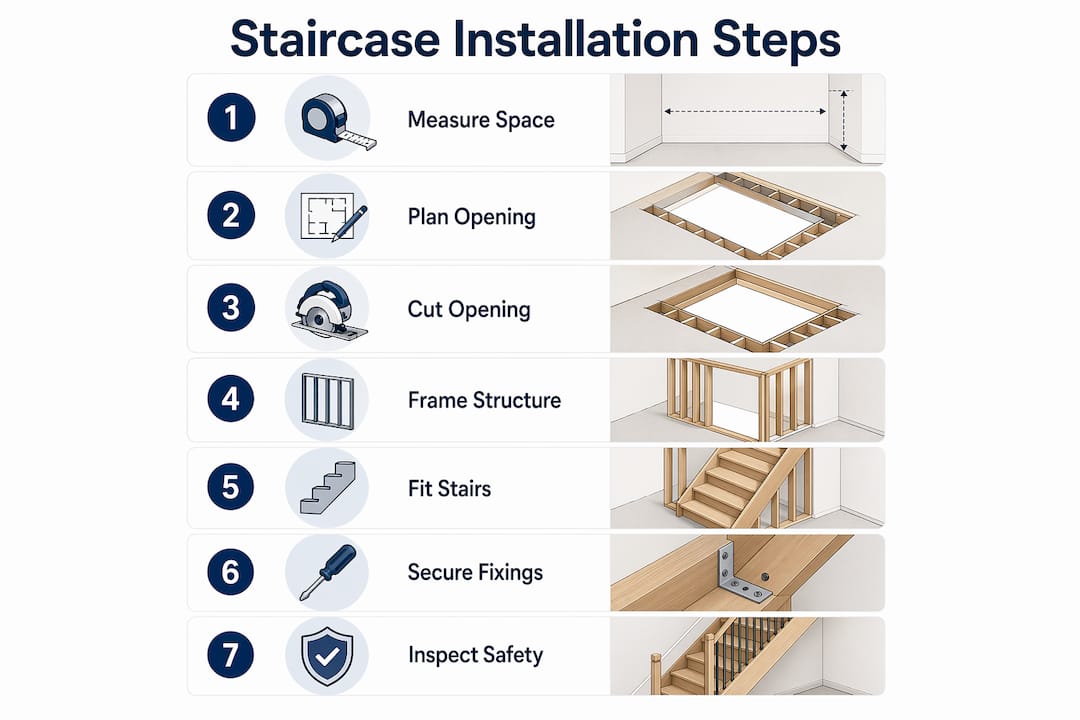
Step-by-step guide to installing a loft staircase safely
Follow these steps in order. Skipping stages, particularly the structural and fire safety elements, leads to inspection failures.
Mark the opening. Use your approved drawings to mark the ceiling opening precisely. Double-check all dimensions against your Building Control submission before cutting.
Cut the opening. Use a reciprocating saw to cut along your marked lines. Work slowly and support the cut section from below to prevent it dropping and damaging the floor below.
Install headers and trimmers. Fit double trimmers along each side of the opening and headers across the top and bottom. Secure with structural joist hangers and appropriate fixings.
Acclimate the stair kit. Allow new wooden components to acclimate for at least 48 hours in the room before fitting. Humidity changes cause warping in timber that has not adjusted to the environment.
Position and level the stair unit. Lower the staircase into the opening and check for plumb and level on all axes. Use a long spirit level and adjust stair feet as needed.
Secure the unit. Fix the stair unit to the headers and trimmers using lag bolts rather than nails. Lag bolts provide significantly greater holding strength and resist the dynamic loads a staircase experiences daily.
Adjust and trim stringers. Cut the stringers to achieve full, even contact with the floor below. Uneven stringer cuts create rocking and noise.
Install handrails and balustrades. Fix handrails at 900–1,000mm height. Check every balustrade gap with a 100mm gauge.
Fit fire doors. Install FD20 or FD30 rated doors at the loft level with intumescent strips and self-closing mechanisms.
Test and verify. Walk the staircase fully loaded, check all fixings, confirm smoke alarm interconnection, and arrange your final Building Control inspection.
The optimal step rise is 185mm with a going of 245mm. This balance suits most adults and passes inspection comfortably. If your floor-to-floor height does not divide evenly into 185mm rises, adjust the number of steps rather than making individual rises uneven. Uneven rises are the single most common cause of inspection failure.
Installation stage | Key check |
Opening cut | Dimensions match approved drawings |
Structural framing | Double trimmers, joist hangers fitted |
Stair positioning | Plumb and level on all axes |
Handrail and balustrade | 900–1,000mm height; 100mm sphere rule |
Fire doors | FD20/FD30 rating, intumescent strips, self-closer |
Final inspection | Building Control sign-off obtained |
Pro Tip: Calculate your total rise first, then divide by 185mm to find the number of steps. Round to the nearest whole number and recalculate each rise to keep them perfectly equal.
What common mistakes cause loft staircase installation problems?
Most installation problems are predictable and preventable. Knowing them in advance saves time and money.
Uneven step rises. This is the most common cause of inspection failure. Every rise must be identical. Even a 5mm variation across the flight creates a trip hazard and fails Part K.
Insufficient headroom. Measuring to the raw rafter rather than the finished ceiling level is a frequent error. Plasterboard and insulation can reduce clearance by up to 200mm, turning a compliant space into a non-compliant one.
Under-reinforced joists. Cutting joists without fitting proper double trimmers and headers creates structural risk. Building Control will identify this at the structural inspection stage.
Using a pull-down ladder for a habitable room. Temporary ladders do not comply for living spaces. This causes inspection failure and creates resale complications that are difficult and expensive to resolve.
Ignoring fire safety. Missing FD20/FD30 fire doors or failing to install mains-powered interlinked smoke alarms delays final sign-off and can invalidate your building insurance.
If your staircase opening is slightly misaligned, do not force the unit into position. Recut the opening carefully rather than packing out one side. A forced fit creates uneven rises and structural stress on the fixings. For guidance on broader building regulation compliance, understanding the full regulatory picture helps you avoid surprises at every stage.
Pro Tip: Have your Building Control officer visit at the structural stage before you close up the ceiling. Catching problems early costs far less than opening up finished work.
Key takeaways
A compliant loft staircase requires correct geometry, proper structural reinforcement, and full fire safety provisions before Building Control will issue sign-off.
Point | Details |
Regulatory geometry | Risers must be 150–220mm, going minimum 220mm, pitch no more than 42°. |
Headroom accuracy | Measure to finished ceiling level to avoid losing up to 200mm of clearance. |
Structural reinforcement | Never notch joists beyond 1/6 depth; use double trimmers and joist hangers. |
Fire safety compliance | FD20/FD30 doors, 30-minute fire resistance, and interlinked mains smoke alarms are mandatory. |
Permanent stairs required | Pull-down ladders do not comply for habitable loft rooms and cause resale problems. |
What I have learned from loft staircase projects in London
Working on loft conversions across Fulham, Kensington, and Chiswick over many years, I have seen the same surprises catch homeowners off guard repeatedly. The biggest one is always the headroom. Homeowners measure the raw ceiling height, feel confident, and then discover that plasterboard, insulation, and floor build-up have eaten into that clearance. By the time the finished surfaces are in, what looked like a comfortable 2,100mm has become a borderline 1,950mm. Measure twice to the finished level, always.
The second surprise is timber acclimation. People buy a beautiful oak stair kit, store it in a cold garage, and fit it immediately. Six weeks later, the treads have moved and the balustrade fixings are working loose. Forty-eight hours in the room before installation is not optional. It is the difference between a staircase that stays tight and one that creaks and shifts.
My honest view on DIY versus professional installation: the preparation and framing stages are where most homeowners should consider bringing in a structural carpenter, even if they handle the finishing themselves. Getting the opening wrong is expensive to fix. Getting the geometry right from the start is not. For complex loft layouts, particularly in older London properties with irregular joist spans, professional input on the structural work pays for itself. You can read more about maximising your loft’s value to understand how the staircase position affects the usable floor area above.
Plan the staircase position before you plan anything else in the loft. It dictates where the headroom lands, where the door goes, and how much usable floor space you actually have. Homeowners who treat the staircase as an afterthought end up with awkward layouts that limit the room’s potential.
— Mateja
Tenenltd’s loft conversion services in London
Tenenltd has been delivering professional loft conversions across West and Central London since 2006. Every project includes staircase design, structural work, Building Control submissions, and full fire safety compliance, handled by an experienced team that knows London’s older housing stock inside out.
If you are planning a loft conversion in Fulham, Chelsea, Kensington, Hammersmith, or Notting Hill, Tenenltd manages the entire process from initial survey through to final Building Control sign-off. The team handles the regulatory complexity so you can focus on how you want to use your new space. Speak to Tenenltd about your project and get a clear picture of what your loft conversion can achieve.
FAQ
What is the maximum pitch for a loft staircase in the UK?
UK Building Regulations Part K set the maximum pitch at 42°. Steeper angles fail compliance and will not receive Building Control sign-off.
Do I need Building Control approval for loft stairs?
Yes. Any loft conversion creating a habitable room requires Building Control approval, including inspections at the structural, mid-build, and final stages.
Can I use a pull-down ladder for a habitable loft room?
No. Permanent stairs are required for any loft used as a living space. Pull-down ladders only comply for storage access and will cause inspection failure if used otherwise.
What headroom is required above loft stairs?
The minimum is 2,000mm vertically from the stair nosing. Under sloping ceilings, this reduces to 1,900mm at the centre line and 1,800mm on the lower side.
How do I avoid uneven step rises on my loft staircase?
Divide your total floor-to-floor rise by 185mm to calculate the number of steps, then recalculate each individual rise to keep them equal. Adjusting the number of steps rather than accepting uneven heights is the correct approach and prevents inspection failure.
Recommended
Comments