
Loft insulation workflow: a London homeowner's guide
TL;DR:
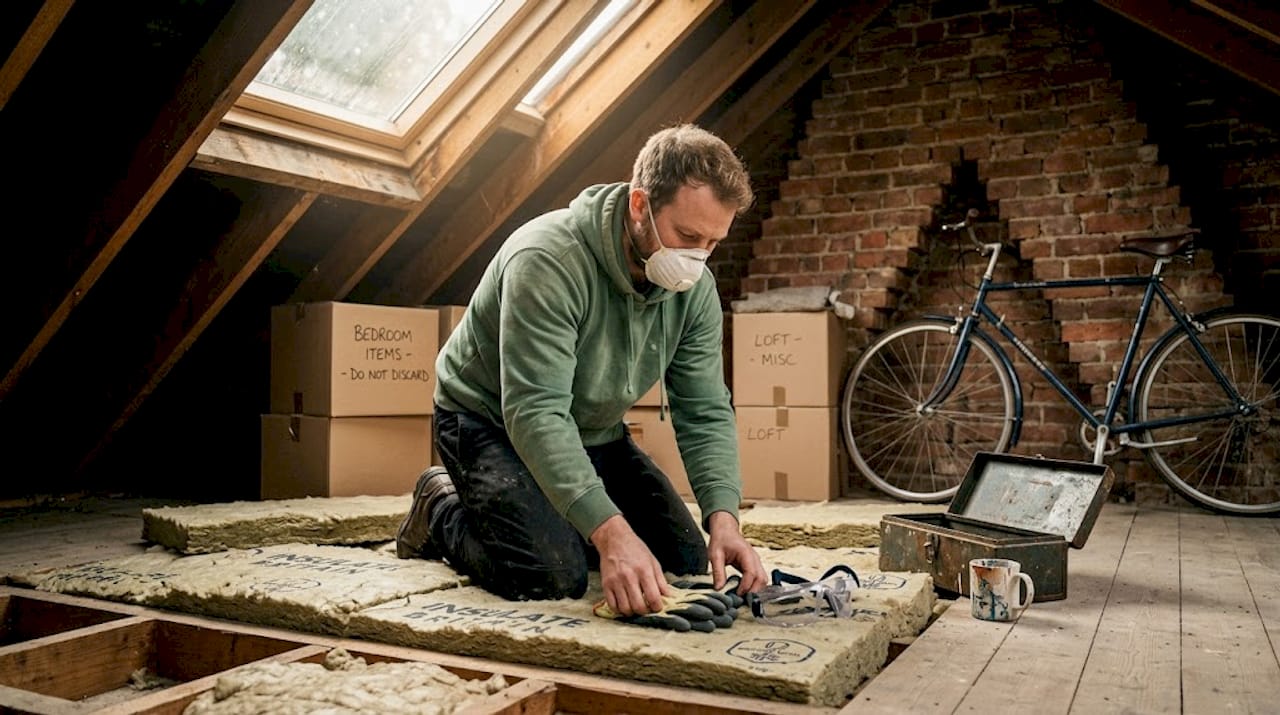
Getting your loft insulation right significantly reduces heat loss, lowering energy bills by up to £300 annually. Proper preparation, sealing gaps, maintaining ventilation, and avoiding insulation compression are essential for effective installation. For complex roofs or moisture issues, consulting professionals ensures lasting, safe, and compliant results.
Getting your loft insulation right is one of the most cost-effective improvements you can make to a London property. An uninsulated loft can account for up to 25% of a home’s total heat loss, meaning your boiler works overtime while warmth silently disappears through the ceiling. A well-executed loft insulation workflow changes that picture entirely. Done correctly, it can cut energy bills by £200 to £300 per year, with costs typically repaid within one to two years. This guide walks you through every stage of the loft insulation process, from preparation through to quality checks, so you can get it done properly.
Table of Contents
Key takeaways
Point | Details |
Seal gaps before insulating | Air gaps around pipes and cables reduce insulation effectiveness by up to 30%; seal them first. |
Layer to 270mm total depth | Use 100mm between joists and 170mm across them to eliminate thermal bridging and reach recommended performance. |
Ventilation is non-negotiable | Maintain a 50mm gap at the eaves using rafter trays to prevent condensation and timber rot. |
Never compress insulation | Compression significantly reduces thermal resistance; use loft legs if you need storage above insulation. |
Know when to call a professional | Complex wiring, damp, or awkward roof shapes are best handled by an experienced contractor. |
The loft insulation workflow: materials and tools
Before you lift a single roll of mineral wool, you need the right materials and safety equipment in place. Arriving underprepared is how small jobs become expensive problems.
Choosing your insulation material
The most widely used option for a standard loft floor is mineral wool rolls (also called glass wool or rock wool). They are affordable, widely available, and straightforward to cut and lay. For harder-to-reach or irregularly shaped lofts, blown-fibre insulation is an alternative, though this method requires a specialist installer. Note that blown-fibre installation requires MCS certification to confirm quality and compliance, so it is not a DIY option.
What you will need
Item | Purpose |
Mineral wool rolls (270mm total) | Primary thermal insulation layer |
Rafter trays or baffles | Maintain ventilation gap at the eaves |
Expanding foam or rigid board | Sealing air gaps around pipes and cables |
Loft legs and boarding | Raise storage boards above insulation level |
Fire-rated downlight covers | Safe clearance around non-IC rated downlights |
Measuring tape and craft knife | Accurate cutting without compressing insulation |
Knee pads and temporary boards | Safe movement across joists |
Gloves, dust mask, safety glasses, long sleeves | Protection from mineral wool fibres |
Safety equipment is not optional. Mineral wool fibres irritate skin and lungs, and lofts frequently contain electrical wiring, older lagging, and inadequate lighting. Work in short stints and take breaks in fresh air.
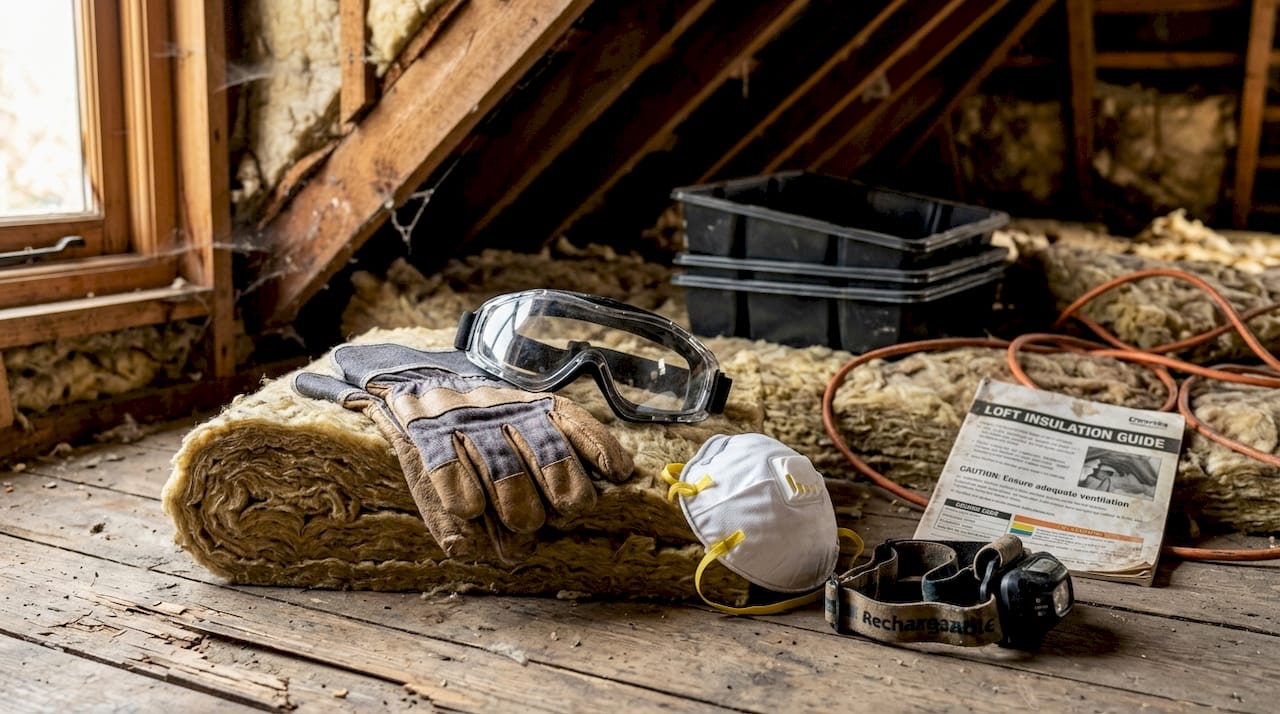
Pro Tip: Take a head torch rather than relying on a single portable lamp. Both hands need to be free when you are cutting and positioning rolls across joists.
Costs for materials on a typical semi-detached London property generally fall in the £150 to £250 range for DIY work, with the total professional installation cost usually running between £300 and £500 including labour.
Preparing your loft before you insulate
Thorough preparation is where most DIY projects quietly fail. Rushing into laying rolls without addressing what is already up there will undermine every layer you put down.
Follow these steps before any insulation material is unrolled:
Clear the loft completely. Remove all storage, boxes, and loose items. You need an unobstructed view of every joist bay and the eaves.
Inspect existing insulation. If there is old insulation in place, check it for damp, mould, or degradation. Damp or mouldy insulation must be removed before new material goes in. Overlaying contaminated insulation traps moisture and causes long-term structural damage.
Check for wiring hazards. Look for old rubber-coated cables, junction boxes sitting under existing insulation, and any wiring that appears damaged. If in doubt, have an electrician inspect before you proceed.
Seal air gaps. Use expanding foam around pipe penetrations, cables entering the loft, and around the loft hatch frame. Sealing these gaps first is the single most impactful preparation step. Unsealed gaps can reduce the efficiency of even well-laid insulation by up to 30%.
Insulate and draught-proof the loft hatch. Fit a layer of rigid insulation board to the back of the hatch door and add a draught-proofing seal around the frame. Expert installers treat the loft hatch as a priority weak point because it is often the most significant unaddressed source of heat loss.
Install rafter trays at the eaves. Before any insulation goes near the eaves, push rafter trays or baffles into each joist bay between the rafters. These maintain the airflow channel at roof level.
Set up safe access. Lay temporary boards or scaffolding planks across joists so you can move around without putting a foot through the ceiling below.
Pro Tip: Use a bright inspection lamp to check the eaves before fitting rafter trays. Loose debris, old insulation fragments, or bird material can block the very airflow channels you are trying to protect.
Laying the insulation: the step-by-step process
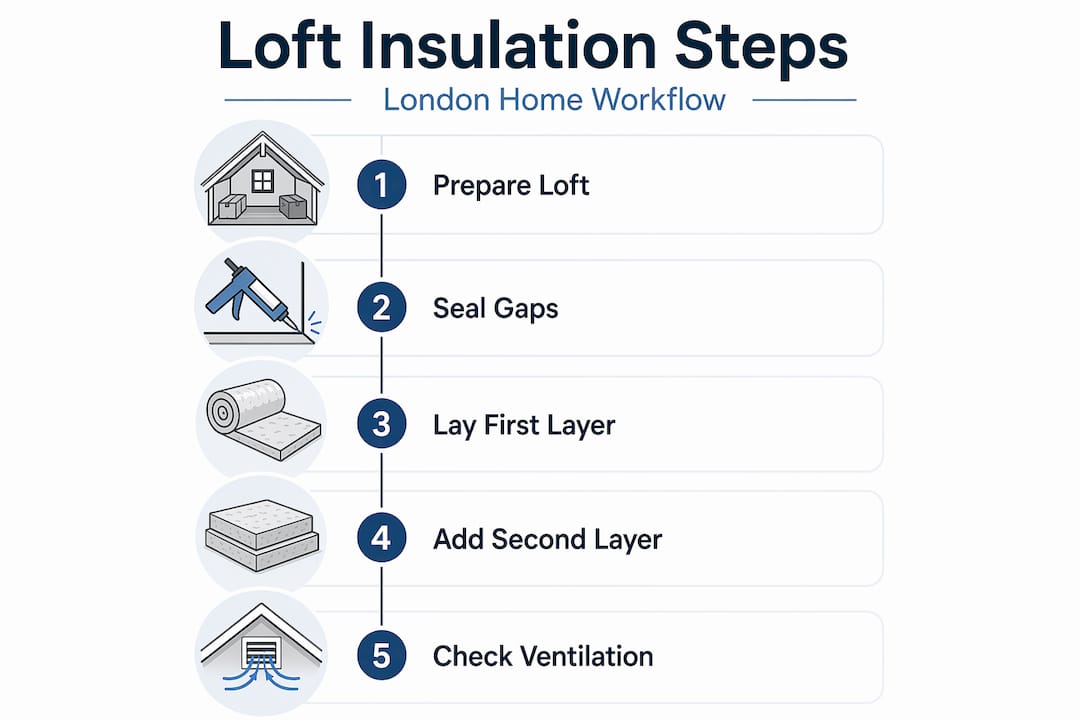
This is the core of any loft insulation installation guide, and the stage where the most consequential mistakes happen. Take your time here.
First layer: between the joists
Start at the eaves end of each joist bay and work inwards towards the centre of the loft.
Cut each roll to fit snugly between joists without forcing or compressing the material. Compression reduces thermal resistance significantly. Each 10% of compression can cut effectiveness by roughly 20%.
Lay 100mm depth mineral wool across the full floor area, including under water tanks where safe to do so, but leave the area immediately around tanks accessible.
Keep the 50mm ventilation gap at the eaves clear by ensuring your rafter trays are in position. Blocking airflow at the eaves leads to moisture buildup that damages roof timbers over time.
Second layer: across the joists
Lay the second layer of mineral wool (typically 170mm) at 90 degrees across the joists. This cross-layer eliminates thermal bridging through the joists themselves, which otherwise create cold pathways through your insulation.
Butt rolls tightly together at the edges with no gaps. The principle here is simple: gap-free coverage preserves trapped air, which is what actually provides thermal resistance. The insulation is not doing the work; the still air within it is.
“The total recommended insulation depth is 270mm, most commonly achieved as 100mm between joists plus 170mm across them. This is the standard the UK government and energy bodies currently recommend for optimal loft performance.”
Handling obstacles and special areas
Downlights: Never cover non-IC rated downlights with insulation. Fit fire-rated loft caps over each fitting before laying the second layer, maintaining a 50 to 75mm clearance from the fitting itself.
Water tanks and pipes: Do not insulate beneath cold water tanks. The small amount of warmth rising from the rooms below helps prevent freezing. Lag exposed pipes with pipe lagging instead.
Storage areas: If you need to store items in the loft, use loft legs to raise boarding well above the insulation surface. Loft legs typically raise boards 175mm to 300mm, preserving the full insulation depth beneath.
Pro Tip: Roll out the second layer in the opposite direction to the first and stagger the joints so they do not align. This eliminates pathways for cold air to travel through the joins.
Quality checks and common mistakes
Once the insulation is laid, a methodical check confirms the work will actually perform as expected. Do not skip this stage.
What to check after installation
Consistent depth. Measure the total depth at multiple points across the loft floor. You are looking for a consistent 270mm with no dips, compressions, or areas where rolls have been left short.
Eaves ventilation. Check that rafter trays remain visible and unobstructed at each bay. Loft ventilation gaps are what dissipate moisture and prevent insulation degradation over time.
Downlight covers. Confirm every loft cap or fire hood is correctly seated and that insulation does not press directly against any electrical fitting.
No gaps at edges or around obstructions. Pay attention to the perimeter of the loft, around hatch openings, and anywhere pipework or cables pass through the insulation layer.
Loft hatch seal. Open and close the hatch to confirm the draught seal makes full contact with the frame all the way round.
Common mistakes and how to compare them
Common mistake | Better approach |
Compressing insulation to fit obstacles | Cut accurately so rolls sit at full loft insulation depth without pressure |
Blocking eaves vents with insulation | Fit rafter trays first and confirm airflow before laying any material |
Laying new insulation over damp old material | Remove and dispose of any contaminated existing insulation first |
Ignoring downlight clearances | Use fire-rated covers before the second layer goes down |
Not sealing the loft hatch | Add rigid insulation board and draught seal as part of preparation |
If you discover damp patches, signs of mould on timbers, or wiring that concerns you during the installation, stop and bring in a professional. DIY loft insulation works well for simple, accessible lofts, but complex roof shapes, ongoing moisture problems, or unsafe electrical arrangements need expert attention.
My perspective on loft insulation in London homes
Working across London properties for nearly two decades, I have seen the same pattern repeat itself more times than I can count. Homeowners spend time and money on insulation, then wonder a year later why their heating bills have not shifted much. Nine times out of ten, the answer is ventilation. The eaves were blocked, the rafter trays were not fitted, or the original gaps were never sealed.
The loft hatch is the other area I would urge every reader to take seriously. It is small, easy to overlook, and almost never properly addressed. Yet it sits directly above your living space and is frequently left as a single sheet of thin plywood. Insulating it properly takes twenty minutes and costs almost nothing.
My honest advice on the DIY versus professional question is this: if your loft is a standard rectangular space with visible joists, no active damp, and no unusual wiring, you can do this yourself and do it well. But if you are managing an older terraced property in Kensington or a period conversion in Notting Hill where the roof structure is anything other than straightforward, the cost of getting it wrong far exceeds the cost of a professional installation. Quality preparation, properly maintained ventilation, and disciplined attention to the cross-layer detail will give you results that last decades. Rushing any one of those three elements will give you a loft that looks insulated but performs poorly.
— Mateja
Get expert help with your London loft project
If your loft insulation project is more involved than a straightforward roll-and-lay, or you are considering a full loft conversion in London, Tenenltd is ready to help. Established in 2006, we have been working with homeowners and property managers across Fulham, Chelsea, Kensington, Chiswick, Hammersmith, and Notting Hill on projects that range from straightforward insulation upgrades to complete property refurbishments.

Our team handles the full scope of loft work: preparation, sealing, insulation installation, and any associated structural or conversion requirements. We work to high standards on every project, and we know London’s period housing stock well enough to anticipate the complications before they become costly surprises. Whether you want a quotation for a straightforward insulation upgrade or you are exploring what a loft conversion could add to your home’s value and space, get in touch with Tenenltd for a no-obligation conversation and tailored advice.
FAQ
What is the recommended depth for loft insulation in the UK?
The recommended total depth is 270mm. This is typically achieved by laying 100mm of mineral wool between the joists and a further 170mm across the joists to reduce thermal bridging.
How do I keep ventilation working after insulating my loft?
Fit rafter trays or insulation baffles in each joist bay at the eaves before laying any insulation. These maintain a 50mm airflow channel that prevents condensation and moisture damage to your roof timbers.
Can I insulate my loft myself?
DIY loft insulation is suitable when your loft has a simple layout, visible joists, and no damp or wiring hazards. Complex roofs or existing moisture problems are better handled by a professional.
Why is my loft insulation not reducing my energy bills?
The most common reasons are unsealed air gaps around the loft hatch or pipework, compressed insulation that has lost its thermal resistance, or blocked eaves vents causing damp and degradation. Check all three before adding more material.
Do I need to do anything special around downlights?
Yes. Fit fire-rated covers over any non-IC rated downlights before laying insulation across them. Maintain a 50 to 75mm clearance from each fitting to prevent heat buildup and fire risk.
Recommended
Comments