
West London refurbishment checklist: step-by-step guide
- luka bursac
- Apr 1
- 7 min read

Planning a refurbishment in West London can feel overwhelming. There are contractors to find, budgets to set, permissions to secure, and rooms to transform, all at once. Without a clear structure, even the most motivated homeowner can lose track of priorities and watch costs spiral. A well-organised checklist changes everything. It gives your project direction, keeps your team accountable, and helps you anticipate problems before they become expensive surprises. Whether you are updating a Victorian terrace in Chiswick or modernising a flat in Kensington, this step-by-step guide will walk you through every critical stage of a successful West London refurbishment.
Table of Contents
Key Takeaways
Point | Details |
Start with clear goals | Setting objectives and a budget gives your refurbishment structure and reduces surprises. |
Know regulations | Securing proper permissions and understanding compliance are critical before any works begin. |
Organise your schedule | Dividing the project into phases keeps everything on track and minimises delays. |
Room-specific checklist | A tailored checklist for each space guides accurate, efficient refurbishment. |
Expert guidance matters | Local specialists can simplify the process and deliver high-quality results. |
Set clear refurbishment goals and plan your budget
Before a single wall comes down, you need to know exactly what you want to achieve. Are you focused on energy efficiency, creating more space, modernising outdated interiors, or increasing your property’s value? Defining your priorities upfront shapes every decision that follows, from materials to contractor selection.
Once your goals are clear, build a realistic budget. Many homeowners underestimate costs by forgetting to include a contingency fund. We recommend setting aside at least 10 to 15 per cent of your total budget for unexpected expenses. Structural surprises, material price changes, and minor design adjustments are common, and having that financial buffer prevents panic mid-project.
Good refurbishment budgeting tips will also help you understand where your money delivers the most impact. Kitchens and bathrooms typically offer the strongest return on investment, while cosmetic updates like painting and flooring can transform a space at a fraction of the cost of structural work.
Here are the key priorities to define at the outset:
Energy efficiency: Insulation, double glazing, and updated heating systems
Space and layout: Extensions, loft conversions, or internal reconfigurations
Modernisation: Updated kitchens, bathrooms, and living areas
Property value: Improvements that appeal to future buyers or tenants
Pro Tip: Research the property refurbishment benefits specific to your area. West London property values respond strongly to quality refurbishments, so aligning your goals with market demand is a smart move. A typical London renovation runs for 8 or more weeks, progressing from strip out and demolition in weeks one and two, through structural works, first fix, plastering, second fix, decorating, and finally snagging. Knowing this timeline helps you plan your finances week by week.
Understand permissions, regulations and compliance in West London
With your goals and budget in place, the next step is understanding what you are legally required to do before work begins. This is where many homeowners lose time, because they start work without the correct approvals and face costly stoppages.
West London boroughs, including Kensington and Chelsea, Hammersmith and Fulham, and Ealing, each have their own planning requirements. Structural changes, extensions, and loft conversions almost always require planning permission. If your home is a listed building or sits within a conservation area, you will need additional consent before altering its appearance or structure.
Party wall agreements are another important consideration. If your work affects a shared wall with a neighbour, you are legally required to serve notice under the Party Wall Act 1996. Skipping this step can result in legal disputes that halt your project entirely.
Key compliance areas to check before starting:
Planning permission: Required for extensions, loft conversions, and structural changes
Listed building consent: Mandatory for any alterations to a listed property
Party wall agreement: Needed when work affects shared or boundary walls
Building regulations approval: Covers structural, electrical, and plumbing standards
Conservation area restrictions: Limits on external changes in protected zones
For specific projects, understanding bathroom refurbishment regulations and home extension permissions will help you stay compliant from day one. Compliance checks typically occur during weeks three and four of a London refurbishment, covering structural works and regulatory sign-off.
Pro Tip: Visit your local authority’s planning portal early in the process. Many boroughs offer pre-application advice services, which can save you weeks of back-and-forth once your formal application is submitted.
Create a detailed schedule and organise your contractors
Once compliance is confirmed, it is time to build your project schedule and assemble your team. This stage is where organisation pays off most visibly. A clear plan keeps every contractor aligned and prevents the costly overlaps and gaps that cause delays.
Break your project into defined phases and assign realistic timeframes to each:
Strip out and demolition (weeks 1 to 2)
Structural works (weeks 3 to 4)
First fix (electrical, plumbing, carpentry) (weeks 5 to 6)
Plastering and screeding (weeks 7 to 8)
Second fix (fitting out electrical, plumbing, joinery) (weeks 9 to 10)
Decorating and finishing (weeks 11 to 12)
Snagging and sign-off (final week)
A full London renovation typically spans 8 or more weeks, with each phase building on the last. Rushing any stage creates problems that surface later, often during snagging.
Phase | Key tasks | Responsible party |
Strip out | Demolition, waste removal | Main contractor |
Structural | Beams, walls, foundations | Structural engineer |
First fix | Wiring, pipework, framing | Electrician, plumber |
Plastering | Walls, ceilings | Plasterer |
Second fix | Sockets, taps, doors | Trades specialists |
Decorating | Painting, flooring, tiling | Decorator |
Snagging | Punch list, corrections | Project manager |
“A clear schedule minimises delays and maximises quality at every stage.”
Document every contractor agreement in writing, including scope, timeline, and payment terms. For guidance on managing the full process, explore the full refurbishment process or review our property refurbishment service to understand how a professional team handles each phase.
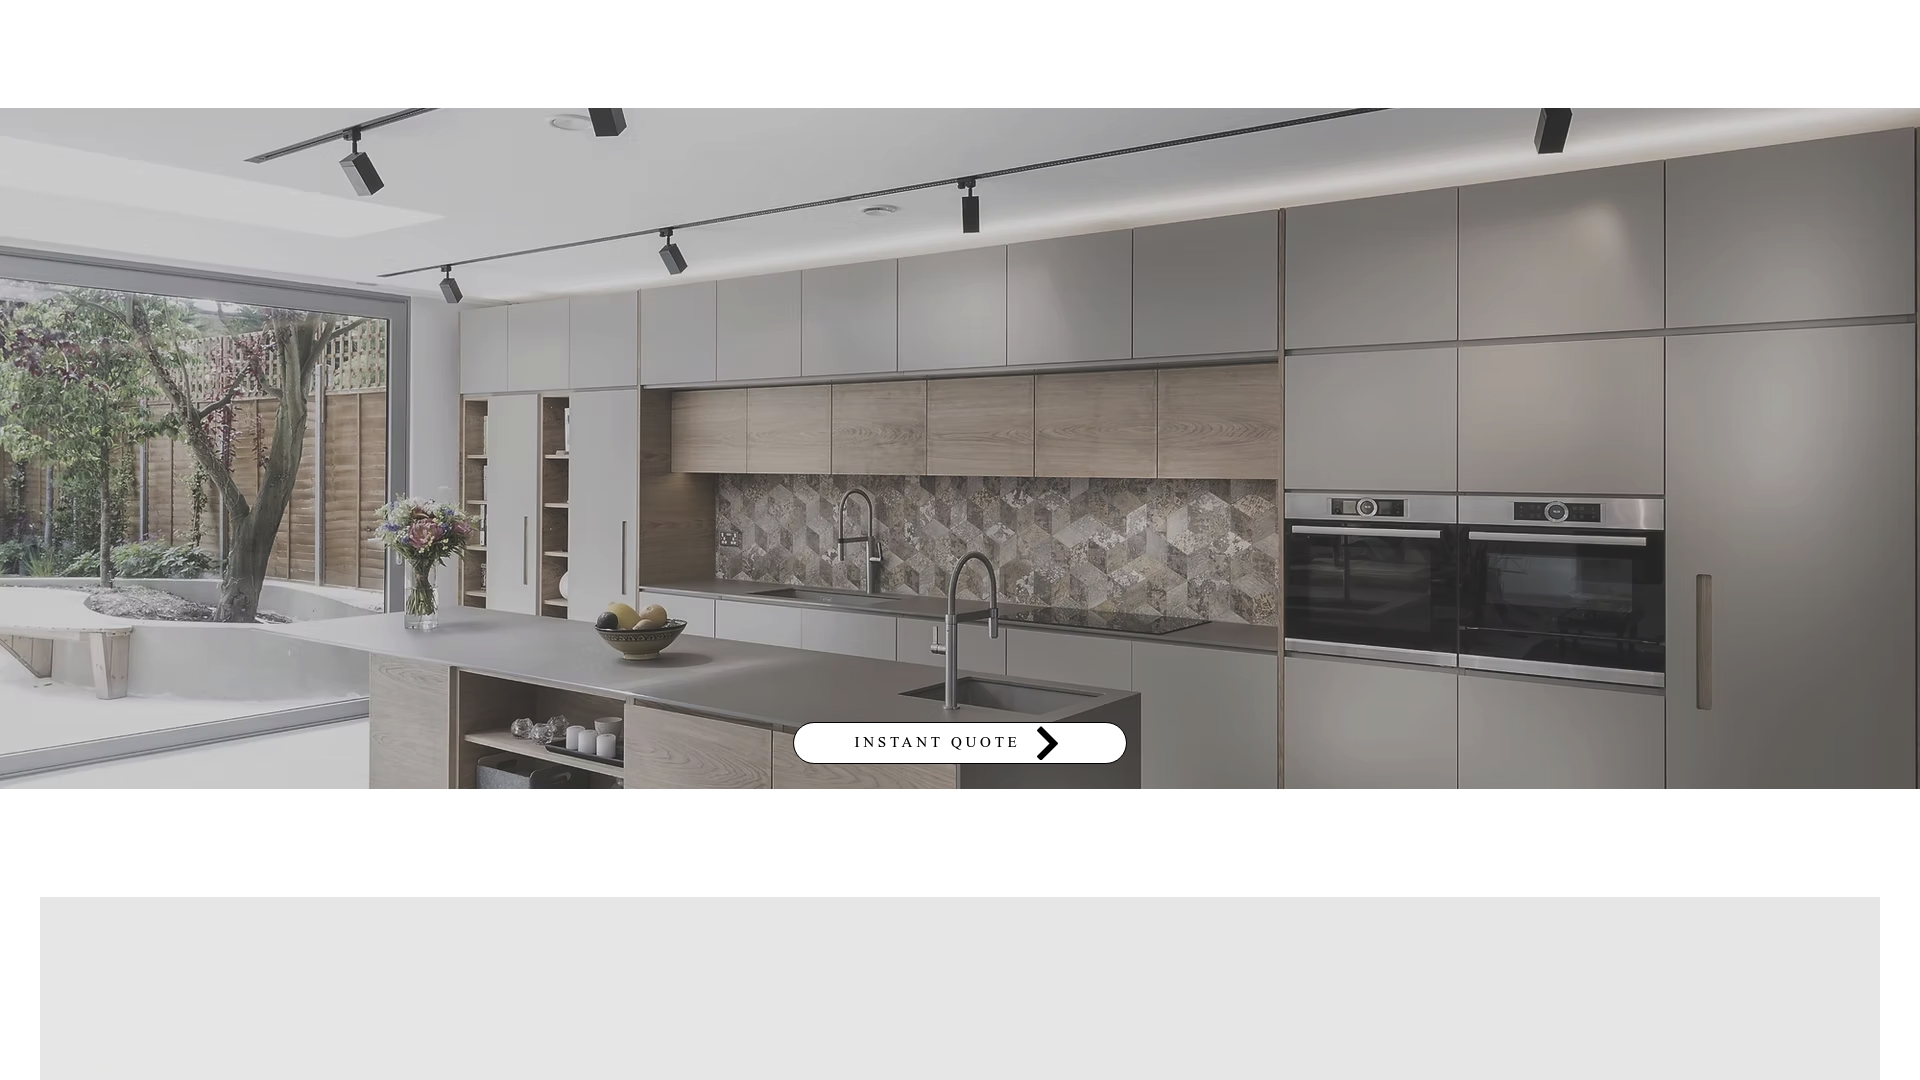
Essential checklist for room-by-room refurbishment
With your schedule set, it is time to get specific. Each room in your home has its own sequence of tasks, and missing even one step can cause rework. London renovations progress through sequential phases for each room, starting with strip out and ending with decoration and snagging.

Here is a practical checklist broken down by room type:
Kitchen:
Strip out existing units and appliances
First fix plumbing and electrical
Install new cabinetry and worktops
Second fix plumbing (sink, dishwasher connections)
Fit appliances and lighting
Tiling, flooring, and decoration
Bathroom:
Strip out sanitaryware and tiles
First fix plumbing and electrical
Waterproofing and tanking
Tiling walls and floor
Fit sanitaryware, shower, and fixtures
Final compliance check and ventilation
Bedrooms and living areas:
Structural works and partition changes
First fix electrical (sockets, lighting)
Plastering and ceiling works
Second fix electrical
Flooring, painting, and joinery
For detailed guidance on bathrooms, the bathroom renovation steps article covers every stage clearly. You can also find broader room improvement tips to inspire your approach across the whole home.
Room | First fix priority | Second fix priority | Compliance check |
Kitchen | Plumbing, electrics | Appliances, lighting | Gas safety, electrics |
Bathroom | Plumbing, waterproofing | Sanitaryware, ventilation | Building regs, Part P |
Bedroom | Electrics | Lighting, sockets | Part P electrics |
Living area | Electrics, heating | Joinery, flooring | None typically |
Using this comparison table helps you spot which rooms carry the most compliance responsibility, so you can allocate time and budget accordingly.
Our hard-won lessons on West London refurbishments
After nearly two decades working on West London homes, we have seen a clear pattern. The projects that run smoothly are not necessarily the ones with the biggest budgets. They are the ones where someone took the checklist seriously from day one.
The most common cause of delays is not structural surprises or contractor availability. It is skipped steps. A homeowner who jumps from demolition to decorating without completing first fix properly will face expensive rework. Snagging issues, which are the final corrections before handover, almost always trace back to a missed item earlier in the process.
One insight that surprises many clients: the checklist is not just a project management tool. It is a communication tool. When every contractor can see the same document and understands their role within it, disputes and misunderstandings drop significantly. We have seen this transform the atmosphere on a job site.
Our advice is to designate a checklist owner in your household. This is one person who reviews progress against the project checklist at the end of each week, flags anything that has slipped, and keeps the momentum going. It sounds simple, but it makes an enormous difference.
Pro Tip: Do not wait until the end of the project to review snagging. Walk through each completed room with your contractor as each phase finishes. Catching issues early is always faster and cheaper than addressing them at the final handover.
Get expert support for your West London refurbishment
A well-structured checklist gives you confidence, but having the right team behind you makes all the difference between a stressful renovation and one that runs smoothly from start to finish.
At Tenen Ltd, we have been helping West London homeowners breathe new life into their properties since 2006. From Fulham to Notting Hill, we manage every phase of your refurbishment with precision and care. Whether you need support with property refurbishment services or are focused on a specific area like bathroom and kitchen refurbishment, our experienced team is ready to guide you. Get in touch today to discuss your project and discover how straightforward a well-managed refurbishment can be.
Frequently asked questions
How long does a typical West London home refurbishment take?
Most projects require at least 8 weeks, with each stage carefully scheduled to maintain quality and avoid costly rework. Larger or more complex projects, such as full house refurbishments or extensions, will take longer.
What permissions might I need for a refurbishment in West London?
Planning permissions, listed building consent, and party wall agreements are often required for structural works. Compliance checks typically occur in weeks three and four, so securing approvals before work begins is essential.
What is included in a full refurbishment checklist?
A full checklist covers demolition, structural works, first and second fix, decoration, and snagging, organised for each room. Sequential room phases ensure nothing is missed and the project progresses in the correct order.
How can I avoid delays or budget overruns?
Detail your schedule before work begins, select trustworthy and experienced contractors, and build a financial contingency of at least 10 to 15 per cent into your budget to stay on track when surprises arise.
Recommended
Comments