
Kitchen renovation workflow: steps for a quality finish
- luka bursac
- Apr 18
- 8 min read

TL;DR:
Proper planning and detailed surveys prevent costly delays and design conflicts.
Following a structured workflow ensures timely progress and high-quality finishes.
Clear communication and sequencing reduce stress and improve renovation results.
A kitchen renovation without a clear plan can quickly spiral into weeks of disruption, unexpected costs, and decisions made under pressure. For homeowners across West London, from Fulham to Kensington, the difference between a smooth project and a stressful one often comes down to having a structured workflow before a single tile is lifted. This guide walks you through every critical stage, from initial planning and budgeting to quality checks and final sign-off, so you can approach your renovation with confidence and get the result your home deserves.
Table of Contents
Key Takeaways
Point | Details |
Plan before you start | Detailed planning and surveys are critical to success and savings in a kitchen renovation. |
Follow the ideal sequence | Executing the renovation in the correct order prevents costly delays and mistakes. |
Budget realistically | Allocating funds and contingency for each workflow stage helps avoid overspend. |
Check quality at each stage | Regular inspections and quick troubleshooting protect your timeline and the final finish. |
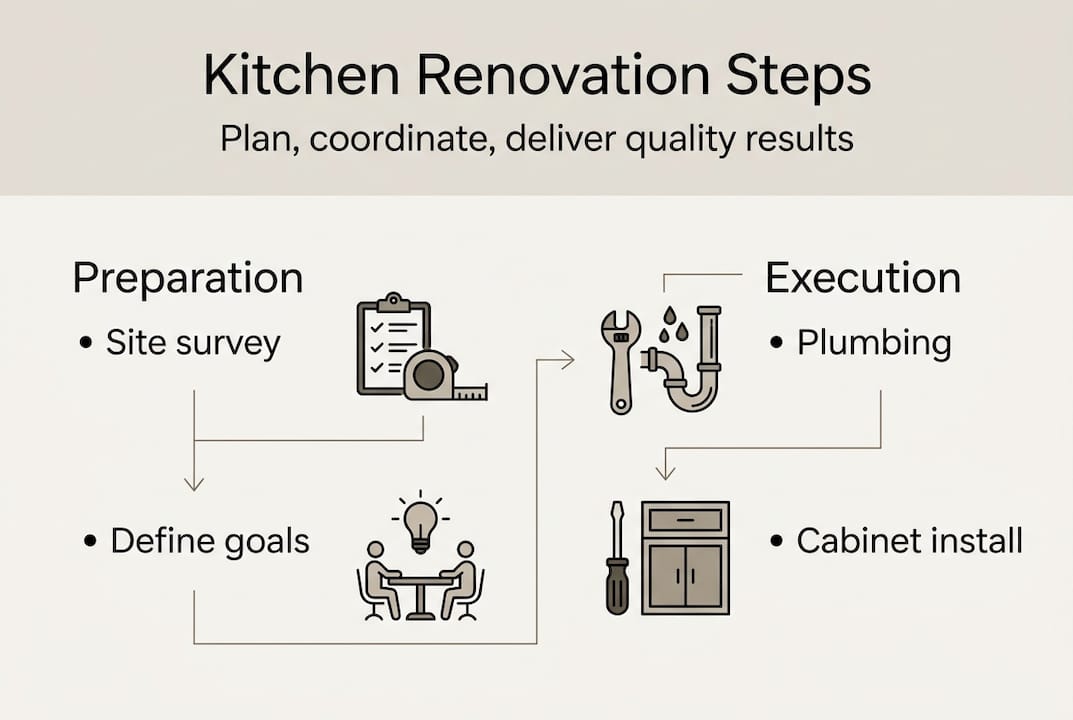
Planning your kitchen renovation: the groundwork for success
Every successful kitchen renovation starts long before any tools arrive on site. Detailed planning is the cornerstone of successful kitchen renovations and directly impacts final outcomes, so investing time here pays dividends throughout the entire project.
The first step is a thorough site survey. This means taking accurate measurements of every wall, window, door opening, and service point. Even a 50mm discrepancy in your measurements can mean a fitted unit that simply will not close properly, or a worktop that needs costly cutting on site. Beyond dimensions, you need to understand where your existing gas, water, and electrical services run, as relocating them adds both time and budget.
Once you have your survey data, define your objectives clearly. Are you prioritising storage, improving the cooking workflow, updating aesthetics, or adding value ahead of a sale? Most West London homeowners want all four, but knowing which matters most helps you make better decisions when trade-offs arise later.
For properties in conservation areas or listed buildings, which are common across Chelsea, Notting Hill, and parts of Chiswick, you may need council approval before altering the external appearance or structural elements. Even for standard properties, building control notification is typically required when you alter electrical circuits or plumbing runs. Confirming this early prevents costly delays mid-project.
Pro Tip: Never skip a properly measured survey before finalising your kitchen design. A professional set of drawings, even for a modest kitchen, can save far more than their cost by catching conflicts between services, structure, and cabinetry before work begins.
Here is a summary of key planning steps to work through:
Site survey and measured drawings (Week 1 to 2)
Define design brief and objectives (Week 1 to 2)
Obtain quotes and appoint contractor (Week 2 to 4)
Submit building control notification if required (Week 3 to 5)
Order kitchen units, appliances, and materials (Week 4 to 6)
Confirm programme of works with contractor (Week 5 to 6)
Planning step | Typical timeframe | Documents needed |
Site survey | 1 to 2 days | Measured drawings |
Design sign-off | 1 to 2 weeks | Drawings, specification |
Building control | 2 to 4 weeks | Application, drawings |
Material ordering | 4 to 6 weeks lead time | Supplier order confirmation |
Programme of works | 1 week | Contractor schedule |
Getting to grips with kitchen renovation fundamentals and planning your kitchen layout early will make every subsequent stage far more straightforward.
Breaking down the step-by-step kitchen renovation workflow
With your planning in place, it is time to break the entire project into actionable steps. A logical sequence is not just good practice; following a stepwise workflow minimises project delays and prevents costly rework.
Here is the core sequence for a full kitchen renovation:
Strip-out and demolition — Remove existing units, flooring, and any redundant services.
First-fix electrics and plumbing — Reroute or install new circuits, pipework, and waste runs before walls are closed.
Structural works — Any wall removals, beam installations, or alterations completed at this stage.
Plastering and screeding — Walls and floors brought to a finish-ready state.
Second-fix electrics and plumbing — Sockets, switches, and appliance connections installed.
Kitchen unit fit-out — Carcasses, doors, worktops, and splashbacks fitted in sequence.
Final finishes — Tiling, painting, and decorating completed.
Commissioning and sign-off — All appliances tested, services checked, and building control sign-off obtained.
Safety note: Before any demolition begins, all gas, electrical, and water services must be professionally isolated and confirmed safe by a qualified tradesperson. Never assume services are dead without a physical check. This is non-negotiable.
Understanding which tasks can run in parallel and which cannot is where experienced contractors save real time.
Task | Can run in parallel with | Must wait for |
First-fix plumbing | First-fix electrics | Strip-out complete |
Plastering | Structural works | First-fix complete |
Unit fit-out | Tiling prep | Plaster dry (min. 1 week) |
Painting | Tiling | Units fitted |
Commissioning | Snagging | All finishes complete |
Pro Tip: Coordinate your material deliveries to arrive just before they are needed, not weeks in advance. A kitchen full of flat-pack boxes blocks trades, slows progress, and risks damage to materials. A tight delivery schedule keeps the site clear and the project moving.

For a broader view of sequencing across your home, the home refurbishment checklist is a useful companion resource.
Budget management and timeline: keeping your renovation under control
A well-organised workflow relies on good financial and time management from the outset. Careful budgeting prevents overspend and enables better decision-making at every workflow stage.
Start by building your budget from the bottom up. List every element: design fees, contractor labour, kitchen units, appliances, worktops, tiling, flooring, electrical, plumbing, plastering, decoration, and waste removal. Then add a contingency of at least 15%. In West London, that figure is often better set at 20%, because factors like restricted parking for skips and delivery vehicles, higher trade rates, and older property construction can all add unexpected costs.
Statistic: UK kitchen renovation projects experience an average cost overrun of 20 to 30%, most commonly caused by unforeseen structural issues and design changes made after work has started.
Here is a typical budget allocation by workflow stage:
Workflow stage | Approximate % of total budget |
Design and planning | 3 to 5% |
Strip-out and structural | 8 to 12% |
First-fix services | 10 to 15% |
Kitchen units and worktops | 30 to 40% |
Appliances | 10 to 20% |
Finishes (tiling, painting) | 8 to 12% |
Contingency | 15 to 20% |
Common budget pitfalls to watch for include:
Changing the design mid-project — Even a small layout change after first-fix can mean replanning pipework and electrics.
Underestimating delivery lead times — Premium appliances and bespoke units can take 8 to 12 weeks. Order late and your project stalls.
Ignoring West London logistics — Parking permits for skips and delivery vehicles in areas like Hammersmith or Kensington add cost and require advance planning.
Skipping a written schedule of works — Without a clear timeline, it is impossible to spot when the project is drifting behind.
Review your budget against actual spend at the end of each workflow stage. Catching a small overrun at plastering is manageable. Discovering it at fit-out is not. The kitchen budgeting basics resource gives you a solid framework to start from.
Quality control and troubleshooting throughout your renovation
Having understood the sequence and budget, keeping your project quality on track from start to finish is what separates a good renovation from a great one. Continuous inspection and prompt resolution of snags maintains progress and overall finish quality.
At each stage of the workflow, carry out these practical checks:
After strip-out: Confirm all services are isolated and the substrate is sound. Look for hidden damp or rot before closing walls.
After first-fix: Check pipe runs and cable routes against your drawings. Photograph everything before plastering covers it.
After plastering: Test walls for level and plumb. Uneven plaster will affect unit alignment and tiling.
After unit fit-out: Check every door, drawer, and hinge. Confirm worktop joints are tight and sealed. Test that appliances fit their designated spaces before final connections.
After tiling: Inspect grout lines for consistency and check that waterproofing upstands are correctly lapped.
Important: Always obtain a written sign-off from your contractor at the end of each major stage before authorising the next payment. This protects both parties and creates a clear record of agreed progress.
When problems do arise, follow this troubleshooting process:
Identify the issue clearly — Is it a material defect, a trade error, or a design conflict?
Document it in writing — Photograph and note the problem immediately.
Raise it with your contractor the same day — Delays in reporting allow issues to compound.
Agree a remedy and timeline in writing — Verbal agreements are hard to enforce.
Confirm the fix before proceeding — Never cover up a problem with the next stage of work.
For further guidance on resolving common site issues, the troubleshooting renovation issues resource offers practical advice drawn from real West London projects.
Why a workflow mindset is your biggest asset in a kitchen renovation
Here is something that only becomes obvious after managing dozens of renovations: the homeowners who get the best results are not always the ones with the biggest budgets. They are the ones who treat the renovation as a process, not a series of individual decisions.
When you improvise, you pay twice. A trade called back to move a socket that was not in the right position costs money, but it also costs time and goodwill. Sequence errors compound. One delayed decision can push back three trades and add weeks to your programme.
What we have seen consistently at Tenen Ltd is that communication and sequence beat expensive materials every time. A beautifully specified kitchen fitted in the wrong order, with no written sign-offs and no clear programme, will always disappoint. A modest kitchen delivered through a disciplined workflow will feel premium because every detail lands correctly.
The other hidden benefit of a workflow approach is stress reduction. When you and your contractor both know what happens next and why, there are fewer disputes, fewer surprises, and a far more enjoyable renovation experience. Explore real-world kitchen workflow examples to see how this plays out in practice across West London homes.
Get expert help for your West London kitchen renovation
If you are ready to transform your kitchen with a structured, professionally managed approach, Tenen Ltd has been delivering high-quality renovations across West London since 2006. We bring the same workflow discipline described in this guide to every project we take on, from initial survey through to final commissioning.
Our team handles kitchen refurbishment in London with a clear programme of works, transparent budgeting, and quality checks built into every stage. Whether your project is a straightforward update or a full structural remodel, we manage the process so you do not have to. Browse our all renovation services to find the right support for your home, and get in touch to arrange a site visit and no-obligation quote.
Frequently asked questions
How long does a kitchen renovation typically take in West London?
A standard kitchen renovation in West London usually takes 4 to 8 weeks, depending on the complexity of the design and lead times for materials and appliances.
What common mistakes delay kitchen renovation projects?
Lack of preparation is a key cause of kitchen renovation delays, alongside mid-project design changes and late material ordering, all of which disrupt the workflow sequence.
Do I need permissions for a kitchen remodel in West London?
In most cases, building control sign-off is required when altering electrics or plumbing, and properties in conservation areas or listed buildings may need additional council approval before work begins.
What is the average cost of a kitchen renovation?
Average costs for London kitchen projects range from £8,000 to over £30,000, with higher figures reflecting both the specification level and the premium associated with West London location and logistics.
Recommended
Comments