
Design and planning overview: your renovation guide
- luka bursac
- 3 hours ago
- 8 min read
TL;DR:
A structured design and planning overview organizes home renovations into five key phases to ensure projects stay on budget and on schedule. Proper planning addresses feasibility, risk, communication, and documentation, reducing costly delays and surprises during construction. Active homeowner involvement and thorough documentation are crucial for successful renovation outcomes and cost control.
A design and planning overview is the structured, staged process that organises your home renovation or extension into clear, manageable phases, from the first sketch to the final build. Without it, projects drift, budgets balloon, and timelines collapse. The industry term for this process is the project design framework, and it covers far more than choosing tiles or picking a paint colour. It spans feasibility assessments, schematic design, construction documentation, and everything in between. This guide walks you through each phase, explains what can go wrong, and shows you how to apply effective planning techniques to your own home.
What is a design and planning overview for home renovations?
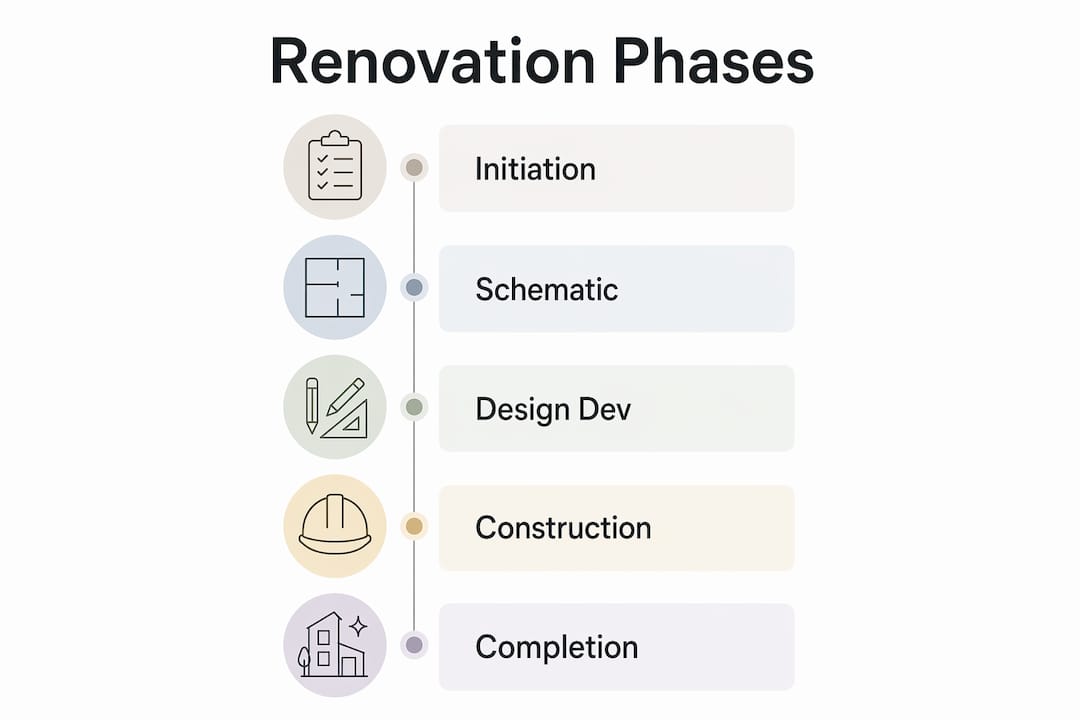
The five key phases of residential renovation design are Initiation, Schematic Design, Design Development, Construction Documentation, and Execution. Each phase builds on the last, and skipping any one of them creates problems that are expensive to fix later.
Here is how professional architecture fees are typically distributed across those phases:
Phase | Fee allocation | What happens |
Pre-design (Initiation) | 10% | Vision, scope, and feasibility established |
Schematic Design | 15% | Conceptual layouts and design options explored |
Design Development | 20% | Materials, dimensions, and systems detailed |
Construction Documentation | 40% | Technical drawings for permits and contractor bids |
Execution | 15% | Build oversight and site management |
The construction documents phase carries the largest fee share at 40%. That reflects the sheer volume of technical work required to produce precise blueprints, specifications, and manuals that contractors and councils rely on.
Initiation. You define what you want, what you can spend, and whether the project is feasible. This is where your architect checks zoning rules, structural constraints, and planning permission requirements.
Schematic design. Your designer produces rough layouts and concept drawings. You review options and give feedback before anything is fixed.
Design development. Dimensions, materials, and building systems are confirmed. This is where kitchen layouts, bathroom fittings, and structural details get locked in.
Construction documentation. Full technical drawings are produced for planning applications, building regulations approval, and contractor pricing.
Execution. The build begins. Your architect or project manager monitors progress against the approved documents.
Pro Tip: Ask your architect to show you a fee breakdown by phase before you sign anything. If construction documentation is underpriced, the drawings will be thin, and thin drawings cause costly disputes on site.
How does thorough project planning improve renovation outcomes?
Six core planning stages define a well-run renovation: defining objectives, scoping and feasibility, budgeting, scheduling, risk planning, and governance. Rushing or skipping any of these stages commonly leads to budget overruns and delays of 20–30%. That figure is not abstract. On a £150,000 extension in West London, a 25% overrun means an extra £37,500 you had not budgeted for.
Here is what each planning stage actually delivers for you as a homeowner:
Defining objectives. You articulate exactly what the project must achieve, whether that is a larger kitchen, an extra bedroom, or a loft conversion that adds lettable space.
Scoping and feasibility. Your team checks what is physically and legally possible on your site. This stage prevents the painful discovery mid-build that your planned rear extension conflicts with a party wall agreement.
Budgeting. You set a realistic cost plan with contingency built in. Tenenltd recommends a minimum 10–15% contingency on any London renovation. For a detailed approach, the step-by-step budgeting guide from Tenenltd is a practical starting point.
Scheduling. A realistic programme is set, accounting for lead times on materials, planning permission windows, and contractor availability.
Risk planning. You identify what could go wrong, from discovering asbestos to a neighbour objecting to your planning application, and you plan responses in advance.
Governance and communication. You agree on how decisions get made, who approves changes, and how information flows between you, your architect, and your contractor.
Early stakeholder buy-in is a key factor in avoiding costly late-stage revisions. A homeowner who is fully briefed and engaged at the planning stage makes faster decisions and generates fewer expensive change orders during the build.
Pro Tip: Hold a brief kick-off meeting with your architect and main contractor before work starts. Agree on a single communication channel, a weekly update schedule, and a clear change-approval process. This one hour of preparation prevents weeks of confusion later.

What are the common pitfalls in design and planning to avoid?
Most renovation problems are not caused by bad builders. They are caused by poor planning decisions made weeks or months before anyone picks up a tool. Understanding where projects typically go wrong puts you in a much stronger position.
Treating planning as just scheduling. Planning covers communication, risk, and resources, not just a Gantt chart. Homeowners who focus only on dates miss the governance and risk elements that protect their budget.
Skipping feasibility assessments. Failing to assess zoning, structural, and permit requirements early commonly causes costly redesigns or project cancellations. This is what professionals call “permit paralysis,” and it can stall a project for months.
Underestimating construction documentation. Thin or incomplete drawings lead to contractor disputes, unexpected variations, and budget creep. The more detailed your construction documents, the fewer surprises appear on site.
Treating design plans as fixed. Design plans should be treated as adaptive living documents that accommodate new information such as site conditions or material availability. A plan that cannot flex will break.
Poor early scoping. Homeowners who separate design and planning as sequential rather than iterative consistently face redesigns and budget overruns. Design choices must be checked against feasibility and budgets before anything is finalised.
The pattern here is clear. Problems compound when early stages are rushed. Investing time and professional fees at the front end of a project is the most cost-effective decision you can make.
How to apply a planning stages overview to your renovation
Knowing the phases is one thing. Applying them to your specific project is another. Here is a practical sequence you can follow, whether you are planning a rear extension in Fulham or a full refurbishment in Kensington.
Prepare a clear brief before your first consultation. Write down your lifestyle needs, your budget range, your preferred timeline, and any known site constraints. A clear brief reduces rework by 25–40% compared to projects with poorly defined scopes. Bring photographs, measurements, and any existing drawings you have.
Work iteratively through schematic to construction documents. Do not approve a schematic design and then disappear until the drawings are done. Review each stage, give specific feedback, and ask your architect to confirm that design choices remain within budget before moving forward.
Build contingency into your budget and schedule from day one. A contingency is not pessimism. It is professional practice. Set it aside and do not touch it unless a genuine unforeseen issue arises.
Make material and procurement decisions during design development. Waiting until the build starts to choose your kitchen units or bathroom fittings causes delays. Long-lead items like bespoke joinery or imported tiles need to be ordered weeks or months in advance.
Use accurate documentation to navigate the permitting process. Your planning application and building regulations submission are only as strong as the drawings behind them. Invest in quality construction documentation. It pays for itself in avoided delays. You can explore how 3D design tools support this process and help you visualise changes before they are built.
Maintain a living document mindset throughout. When site conditions reveal something unexpected, update your drawings and cost plan immediately. Do not carry on and hope the discrepancy resolves itself.
Communicate regularly and formally. Send written summaries after every key meeting. Verbal agreements on site are the single biggest source of disputes in residential construction. A brief email confirming what was decided costs nothing and protects everyone.
For a broader view of how these stages fit into a full renovation programme, the 2026 homeowner’s renovation guide from Tenenltd covers the financial and scheduling dimensions in depth.
Key takeaways
A structured design and planning framework, applied iteratively from feasibility through to construction documentation, is the single most reliable way to keep a renovation on budget and on time.
Point | Details |
Follow the five phases | Move through Initiation, Schematic, Design Development, Documentation, and Execution in order. |
Plan beyond the schedule | Address risk, communication, and resources, not just dates and milestones. |
Invest in documentation | Construction documents carry 40% of architecture fees because they prevent the most expensive mistakes. |
Treat plans as living documents | Update drawings and cost plans whenever site conditions or material availability changes. |
Brief early and clearly | A detailed brief before the first consultation reduces rework by 25–40% on average. |
Why I believe the planning phase deserves more of your budget
Most homeowners I speak with want to spend their money on the build, not the drawings. That instinct is understandable. But after working on projects across West and Central London for nearly two decades, I have seen the same pattern repeat itself. The projects that run smoothly are the ones where the homeowner and their team spent real time and money on the planning stages overview before a single wall came down.
The projects that struggle almost always share one characteristic. Someone rushed the pre-design or skipped a feasibility check to save a few hundred pounds. That saving then cost thousands in redesigns, permit resubmissions, or contractor variations.
What I find genuinely encouraging is how much control you have as a homeowner when you understand this process. You do not need to be an architect. You need to ask the right questions, insist on clear documentation, and treat your design plans as something that evolves rather than something that gets filed away after sign-off. The design and build process works best when the homeowner is an active participant, not a passive one.
The most rewarding projects I have been involved with are the ones where the homeowner came to the table prepared, curious, and willing to engage with the detail. That attitude, more than any single design decision, is what makes a renovation a success.
— Mateja
How Tenenltd can support your design and planning process
Tenenltd has been helping London homeowners plan and build extensions, loft conversions, and full refurbishments since 2006. The team works across Fulham, Chelsea, Kensington, Chiswick, Hammersmith, and Notting Hill, bringing the kind of local knowledge that makes a real difference when navigating planning permissions and building regulations.
Whether you are at the very start of your planning stages overview or ready to move into construction, Tenenltd offers expert guidance at every phase. From initial feasibility through to final build, the team coordinates design professionals, manages documentation, and keeps your project on budget. If you are considering a home extension in London, or exploring a loft conversion, get in touch to discuss your project with a specialist who understands the full process from the ground up.
FAQ
What does a design and planning overview include?
A design and planning overview covers five phases: pre-design, schematic design, design development, construction documentation, and execution. It also encompasses budgeting, risk planning, scheduling, and communication frameworks to keep the project on track.
Why does construction documentation cost so much?
Construction documentation typically accounts for 40% of architecture fees because it produces the detailed technical drawings required for planning permission, building regulations approval, and accurate contractor pricing. Cutting corners here leads to disputes and budget overruns on site.
How early should I start the planning process?
Start planning as early as possible, ideally six to twelve months before your target start date for a major extension or refurbishment. Early planning allows time for feasibility checks, planning applications, and procurement of long-lead materials.
What happens if I skip the feasibility stage?
Skipping feasibility assessments commonly causes costly redesigns or project cancellations due to unresolved zoning, structural, or permit issues. This is known as permit paralysis, and it can stall a project for months while adding significant cost.
How do I keep my renovation on budget during the design phase?
Check every design decision against your cost plan before approving it, build a 10–15% contingency into your budget from the start, and make material selections during design development rather than waiting until the build begins.
Recommended
Comments